TWEAK: Secure Jupyter Notebook with Password

In the previous post, PySpark and Jupyter Notebooks, we got PySpark (Spark Python Big Data API) and jupyter notebook to work in tandem. Thus, we are now able to leverage the power of Spark which is massively parallel processing (MPP), thereby utilizing all cores of the server (or cluster). Execution can scale across several cluster nodes as you want, and as many cores as you want. It is worthy to note that it doesn't necessarily require Hadoop to run.

If you can recall, the execution of [jupyter notebook] with an open IP address showed: WARNING: The notebook server is listening on all IP addresses and not using encryption. This is not recommended. Indeed, while running this on the internal network is acceptable, it does not conform to best practice.

This "might" be acceptable for an internal development setup but is more critical for a public cloud setup. Note that "might" is not acceptable for production notebook servers. So it is better to address the issue.

For added security, let's password-protect the jupyter notebook so that only user's that know the password are able to use the pyspark setup. On the terminal, execute [jupyter notebook password]. Input the password, and repeat when asked.

jupyter notebook password

This protects the jupyter notebook with a password, to keep unauthorized users from incidental access. However, packets are transmitted in plain-text and could be sniffed. The next half of the procedure, solves this problem and completes the resolution of the WARNING message.

Generate the needed certificate for use with the jupyter notebook server. Execute [openssl req -x509 -nodes -days 365 -newkey rsa:1024 -keyout jupyter.pem -out jupyter.pem] to create a self-signed certificate. The command will ask for other details, that's up to you to fill out. I would move the cerfiticate inside the .jupyter directory, so in this procedure that will be considered.

Recall, that we added several lines to the generated jupyter notebook configuration (/home/user/.jupyter/jupyter_notebook_config.py). In that same file add this line:

c.NotebookApp.certfile = '/home/user/.jupyter/jupyter.pem'

The modified configuration encapsulates traffic between the jupyter notebook server and the browser in SSL encryption. And it solves the WARNING. All that needs to be done is restart the notebook application.

RELATED: Set-Up PySpark (Spark Python Big Data API)

Notice that the token is not required by the connection to the jupyter notebook server. This is due to it being protected by password and encapsulated in SSL encryption. This should set you up with a working PySpark installation for multi-threaded data crunching. Next up, let's solve this issue using SSH tunnels instead.


Share:

HOW-TO: PySpark and Jupyter Notebooks

At this point, I have a working persistent terminal session and installed all the necessary components to run PySpark. I just need a development environment where I could put those together to work in tandem.

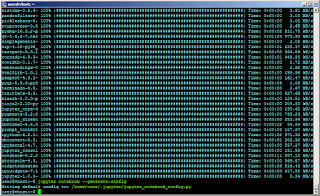
For this I would need the jupyter notebook development environment. For those not familiar with the jupyter environment or what it does, the developers have come up with fantastic documentation in this link. The miniconda3 that was previously installed before is perfect for this. Jupyter integrates right into this. Simply invoke [conda install jupyter --yes], to install jupyter notebook. This will install a lot of python libraries, and will definitely take a while depending on your internet connection.

Again, as mentioned the documentation of jupyter is fantastic. If you refer to the quickstart guides and follow along, the details will get you up and running in no time. For this guide, let's jump a bit forward into the configuration and generate a default configuration. Execute [jupyter notebook --generate-config] on the terminal.


jupyter notebook --generate-config

As seen from the screen capture above, the default configuration file is written to the user's home directory inside a newly created hidden directory ".jupyter". Inside, there will be only one file -- "jupyter_notebook_config.py". Modify this config file such that it allows the jupyter notebook to be accessed by any remote computer on the network.

Insert the following lines of code (start at line #2):

c = get_config()
c.NotebookApp.ip = '*'
c.NotebookApp.port = 8888
c.NotebookApp.open_browser = False

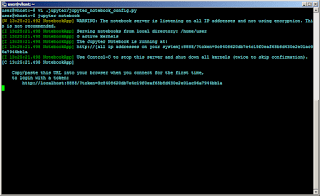
After inserting the lines above, test the configuration by running [jupyter notebook] on a terminal.

jupyter notebook

Once you see the terminal above, where it says "Copy/paste this URL into your browser when you connect..", the jupyter configuration is now good to go. There is one problem, however -- when you close the terminal the jupyter session dies. This is where "screen" comes in. Execute [jupyter notebook] in a screen session and detach the session.

Just so you have an idea what PySpark can do, I have tried sorting 8M rows of a timeseries pyspark dataframe and it took roughly ~4s to execute. Try this with a regular pandas dataframe and it will take minutes to complete. It doesn't stop there, there are lots more it can do.

RELATED: Data Science -- Where to Start?

Having a working PySpark setup residing on a powerful server that is accessible via web is one powerful tool in the arsenal of a data scientist. Next time, let's heed the warning about the jupyter notebook being accessible by everyone -- how? Soon..

Share:

HOW-TO: Set-Up PySpark (Spark Python Big Data API)

Python in itself natively executes single-threaded. There are libraries that allow the possibility of executing code multi-threaded but it involves complexities. The other downside is the code doesn't scale well enough to the number of execution threads (or cores) the code runs on. Running single-threaded code is stable and proven, but it just takes a while to execute.

I have been on the receiving end of the single-threaded execution. It takes a while to execute, and during the development stage the workaround is to slice a sample of the dataset so that execution does not have to take a long time. More often than not, this is acceptable. Recently, I stumbled on a setup that takes code and executes Python multi-threaded. What is cool about it? It scales to the number of cores thrown at it, and it scales to other nodes as well (think distributed computing).

This is particularly applicable to the field of data science and analytics, where the datasets grow into the hundreds of millions and even billions of rows of data. And since Python is the code of choice in this field, PySpark shines. I need not explain the details of PySpark as a lot of resources already do that. Let me describe the set-up so that code executes in as many cores as you can afford.

The derived procedure is based on an Ubuntu 16 LTS installed on a VirtualBox hypervisor, but is very repeatable whether the setup is in Amazon Web Services (AWS), Google Cloud Platform (GCP) or your own private cloud infrastructure, such as VMware ESXi.

Please note that the procedure will enclose the commands to execute in [square brackets]. Start by updating the apt repository with the latest packages [sudo apt-get update]. Then install scala [sudo apt-get -y install scala]. In my experience this installs the package "default-jre" but in case it doesn't, install default-jre as well [sudo apt-get -y install default-jre].

Download miniconda from the continuum repository. On the terminal, execute this command [wget https://repo.continuum.io/miniconda/Miniconda3-latest-Linux-x86_64.sh]. This link points to the 64-bit version of python3. Avoid python2 as much as possible, since development for it is approaching its end; 64-bit is almost always the default. Should you want to install the heavier anaconda3 in place of miniconda3, you may opt to do so.

Install miniconda3 [bash Miniconda3-latest-Linux-x86_64.sh] on your home directory. This avoids package conflicts with the pre-packaged python of the operating system. At the end of the install, the script will ask to modify the PATH environment to the installation directory. Accept the default option, which to modify the PATH. This step is optional, but if you want to you may add the conda-forge channel [conda config --add channels conda-forge] in addition to the default base channel.

Install Miniconda

At this point, the path where miniconda was installed needs to precede the path where the default python3 resides [source $HOME/.bashrc]. This of course assumes that you chose to accept .bashrc modification as suggested by the installer. Next, use conda to install py4j and pyspark [conda install --yes py4j pyspark]. The install will take a while so go grab some coffee first.

While the install is taking place, download the latest version of spark. As of this writing, the latest version is 2.2.1 [wget http://mirror.rise.ph/apache/spark/spark-2.2.1/spark-2.2.1-bin-hadoop2.7.tgz]. Select a download mirror that is closer to your location. Once downloaded unpack the tarball on your home directory [tar zxf spark-2.2.1-bin-hadoop2.7.tgz]. A directory named "spark-2.2.1-bin-hadoop2.7" will be created in your home directory. It contains the binaries for spark. (This next step is optional, as this is my personal preference.) Create a symbolic link to the directory "spark-2.2.1-bin-hadoop2.7" [ln -s spark-2.2.1-bin-hadoop2.7 spark].

The extra step above will make things easier to upgrade spark (since spark is actively being developed). Simply re-point spark to the newly unpacked version without having to modify the environment variables. If there are issues with the new version, simply link "spark" back to the old version. Think of it like a switch with the clever use of a symbolic link.

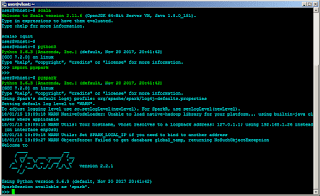
At this point, all the necessary software are installed. It is imperative that checks are done to ensure that the software are working as expected. For scala, simply run [scala] without any options. If you see the welcome message, it is working. For pyspark, either import the pyspark library in python [import pyspark] or execute [pyspark] on the terminal. You should see a similar screen as below.

Test: scala spark pyspark

Modify the environment variables to include SPARK_HOME [export SPARK_HOME=$HOME/spark]. Make changes permanent by putting that in ".bashrc" or ".profile". Likewise, add $HOME/spark/bin to PATH.

RELATED: Data Science -- Where to Start?

This setup becomes even more robust by integrating pyspark with the jupyter notebook development environment. This is a personal preference and I will cover that in a future post.

Share:

TIP: Screen -- Persistent Terminal Sessions in Linux

If there is one thing I learned in Linux that makes life extremly easy, I would say it is the possibility (or ability) to maintain persistent terminal sessions. This tool comes in handy when working remote and working with servers in particular. Imagine if you are uploading a sosreport or uploading huge core dumps as supplement attachments for a support ticket, and your shift ends. Would you want to wait another couple of hours for the upload to finish? Or, would you want to have a persistent terminal session so that your uploads are thugging along while you drive home?

I'm quite sure the answer is obvious. Linux has this utility called "screen". Screen allows the user a persistent shell session, at the same time multiple tabs for the same connection. It also allows the user to disconnect and re-connect at will, which is really handly for remote users or if for some reason the network connection gets interrupted. Another benefit is for users to simultaneously connect to the same screen session.

This utility is not installed by default. In Ubuntu, to install simply run [sudo apt-get -y install screen].

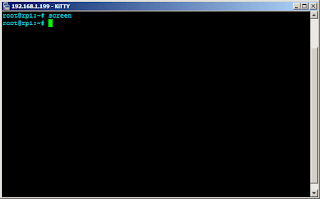
To run screen, simply run [screen]. You might notice that nothing much has changed upon execution, but running [screen -ls] shows a session is already running. This is how plain it looks (I scrolled it back 1 line just to show you I ran screen).

Screen Without .screenrc

You can change this behaviour by making modifications to the screen startup configuration. It is a file named ".screenrc" that is placed in the home directory of the active user. This file does not exist by default and needs to be created by the user himself/herself.

I have created my own ".screenrc". It is available in github at this link: https://github.com/dillagr/dotfiles.

A few notes regarding the configuration. It alters the default behaviour of screen. The control command or escape command which is [CTRL]+[A] by default -- modified to [CTRL]+[G]. Meaning, any other hot-key for screen is preceded by a [CTRL]+[G] then [C] for example to create another tab (or create another window); [CTRL]+[G] then [D] to detach from screen.

Shown below is how it looks on my Raspberry PI. See any notable difference(s) compared to the previous screenshot?

Screen With .screenrc

The other thing that is most notable about this configuration is that you will see the number of tabs at the bottom, the hostname of the server at the lower left corner and the current active tab. This way it is really clear that the terminal is running an active screen session. Scrollback is set to 1024 lines. That way you can go back 1024 lines that are already off the screen. You may customize this as well.

RELATED: Install Adblock on Raspberry Pi via Pi-Hole

Having screen and a persistent terminal session is one of the best tools for a system administrator.. But as I will show you soon, it is not limited to administering servers. Stay tuned.

Share:

FAQ: Data Science -- Where to Start (continued)?

In my previous post "Data Science -- Where to Start?", I enumerated a few specifics regarding my answer and pointed out several Python online courses to effectively jumpstart your data science career. Now, I would like to suggest a specific book to read that will help you focus on an aspect of your professional career and gain insight on a principle that is not adapted by most. This is particularly applicable when you are reaching the age of 30, whereby you have relatively gained experience in a few professional endeavors.

This post in many ways answers the question: "Is it better to focus on my strengths or on my weaknesses?" The book to read is Strengths Finder 2.0 by Tom Rath. And right there, the answer to the question is already a give-away. And, in more ways than one, your knowledge of yourself and your strengths are immensely helpful.

This is how the book looks like.

Strengths Finder 2.0

The book initially discusses the example of basketball's greatest Michael Jordan -- why can't everyone by like Mike? Way back when, my friends and I wanted to be like Mike and the book has a very good explanation of why everyone cannot be like Mike. It begins by quantifying his strength when it comes to basketball. Assuming that on a scale of 1-10, his basketball skills are rated 10 (being the greatest player). Assuming mine are rated 2. More like 1, but for the sake of comparison, lets put it at 2 compared to MJ.

To be able to make it easier to understand, the book quantifies the result of focusing on strengths by taking a product of the rated skillset or strength and the amount of effort put in honing it. I'm quite positive it is exponential in nature not just multiplicative but to illustrate, if MJ does work related to basketball with an effort of 5, that results to 50. Simply put if MJ focuses on basketball and plays to his strength, this goes to a potential of 100.

In contrast, with a rating of 2, I could only go as much as 20. That just requires meager effort from MJ to match. Given the possibility of exponential product from having the innate strength in the first place, the answer to why everyone can't be like Mike could not be any clearer. This is why it is important to know your strengths.

Coincidentally, MJ shifted to baseball. Did he have a successful season like what he had in basketball? History has recorded this outcome and his return to basketball cemented his legacy.

Bundled with the book is a code you could use to take the Strengths Finder exam. It is a series of questions that when evaluated together produces a profile of strengths. I took the exam a while back and my top 5 strengths are: Strategic, Relator, Learner, Ideation and Analytical. The result goes further to describe my top strength as: "People who are especially talented in the Strategic theme create alternative ways to proceed. Faced with any given scenario, they can quickly spot the relevant patterns and issues." The rest of the strengths are discussed as well.

Also included are "Ideas for Action", one of which is: "Your strategic thinking will be necessary to keep a vivid vision from deteriorating into an ordinary pipe dream. Fully consider all possible paths toward making the vision a reality. Wise forethought can remove obstacles before they appear." As I read through my profile, it's like I was reading the explanation of my past experiences. It explains why I behaved that way and why the decision I made was that. More important is why I am who I am now.

I compared my results with others who took the exam, having the Strategic strength and the descriptions are different. Likewise, the ideas for action are disparate. Having similar strengths doesn't mean having the same overall theme. Strengths also boost each others effects. With the exception of Relator, my strengths are bundled along the "Strategic Thinking" domain.

RELATED: Data Science -- Where to Start?

Although knowing your strengths (and "playing" to your strengths) is not entirely data science related, it helps to know. In my experience, the investment in acquiring a copy of the book Strengths Finder 2.0 for myself is definitely worth it, plus the Gallup Strengths Finder exam. If you have taken the exam, share with us your top 5 strengths and how it has helped you with your career so far.

Share:

FAQ: Data Science -- Where to Start?

Data is the new oil. Perhaps this statement has now become a cliche. It goes without saying that data science has become the hottest job of the decade. It was predicted that there will be a shortage of data scientists, and that shortage is already prevalent now.

The reality of it all is this, the academe lags behind in preparing students to fill this gap. Data science is simply not taught in school, and the demand for it grows by the minute. While on the subject of data science, I have been often asked: "Where do I start preparing to gain practical skills for data science?" And too often, my answer is Python. But Python in itself is a broad topic and I will be a little more specific in answering that in question in this post.

In my line of work, having knowledge of Python really gives you an edge, not just an advantage. So if you want to start a career in data science, building a Python skillset is simply practical.

Knowledge, and even expertise, in Python can go a long way. It can be applied to ETL (or extract transform and load), data mining, building computer models, machine learning, computer vision, data visualizations, all the way to advanced applications like artificial neural networks (ANN) and convolutional neural networks (CNN). In any of the mentioned aspects of data science, Python can be applied and building expertise really becomes valuable over time.

Complete Python Bootcamp: from Zero to Hero

For beginners, those who have no idea how to program in Python or those who have only heard about it for the first time, the online course(s) really work. The course that has really helped me in getting a head start is Complete Python Bootcamp: from Zero to Hero. I have mentioned this often enough and will continue to advise the course to anyone who wants to learn Python.

While taking on this course, the other recommendation is building knowledge in jupyter notebooks. This will boost your Python productivity. Also, it helps you understand (and re-use) other peoples code as well as aid you in sharing yours, if you wish to. In fact, several of those online courses share code in the form of jupyter notebooks.

To complete the answer, the Python library to master for data science is pandas. Pandas is often referred to as the Python Data Analysis Library and it rightfully deserves that reputation. More often than not, pandas is involved in data analysis, where it really shows its muscle. My recommended course for learning and mastering pandas is Data Analysis with Pandas and Python.

There goes my answer and I hope that helps you build the needed skillset to build a career on data science. These are by no means the only training courses you need, it simply addresses the "where to start" part of it, in my opinion. The more you use Python in your daily activities, the better honed you become and it will be easier for you to talk in the Python lingo before you notice it.

RELATED: Huge Discounts on Python Courses at Udemy

So, how did your data science journey, or Python experience start? Was this able to answer your question? Share your thoughts in the comments below.

All product names, logos, and brands are property of their respective owners. Use of these names, logos, and brands does not imply endorsement.
Share:

Subscribe for Latest Update

Popular Posts

Post Labels

100gb (1) acceleration (1) acrobat (1) adblock (1) advanced (1) ahci (1) airdrop (2) aix (14) angry birds (1) article (21) aster (1) audiodg.exe (1) automatic (2) autorun.inf (1) bartpe (1) battery (2) bigboss (1) binance (1) biometrics (1) bitcoin (3) blackberry (1) book (1) boot-repair (2) calendar (1) ccleaner (3) chrome (5) cloud (1) cluster (1) compatibility (3) CPAN (1) crypto (3) cydia (1) data (3) ddos (1) disable (1) discount (1) DLNA (1) dmidecode (1) dns (7) dracut (1) driver (1) error (10) esxi5 (2) excel (1) facebook (1) faq (36) faucet (1) firefox (17) firewall (2) flash (5) free (3) fun (1) gadgets (4) games (1) garmin (5) gmail (3) google (4) google+ (2) gps (5) grub (2) guide (1) hardware (6) how (1) how-to (45) huawei (1) icloud (1) info (4) iphone (7) IPMP (2) IPV6 (1) iscsi (1) jailbreak (1) java (3) kodi (1) linux (28) locate (1) lshw (1) luci (1) mafia wars (1) malware (1) mapsource (1) memory (2) mikrotik (5) missing (1) mods (10) mouse (1) multipath (1) multitasking (1) NAT (1) netapp (1) nouveau (1) nvidia (1) osmc (1) outlook (2) p2v (2) patch (1) performance (19) perl (1) philippines (1) php (1) pimp-my-rig (9) pldthomedsl (1) plugin (1) popcorn hour (10) power shell (1) process (1) proxy (2) pyspark (1) python (13) qos (1) raspberry pi (7) readyboost (2) reboot (2) recall (1) recovery mode (1) registry (2) rename (1) repository (1) rescue mode (1) review (15) right-click (1) RSS (2) s3cmd (1) salary (1) sanity check (1) security (15) sendmail (1) sickgear (3) software (10) solaris (17) squid (3) SSD (3) SSH (9) swap (1) tip (4) tips (42) top list (3) torrent (5) transmission (1) treewalk (2) tunnel (1) tweak (4) tweaks (41) ubuntu (4) udemy (6) unknown device (1) updates (12) upgrade (1) usb (12) utf8 (1) utility (2) V2V (1) virtual machine (4) VirtualBox (1) vmware (14) vsphere (1) wannacry (1) wifi (4) windows (54) winpe (2) xymon (1) yum (1) zombie (1)

Blog Archives

RANDOM POSTS