Showing posts with label wifi. Show all posts

HOW-TO: Remove "PLDTHOMEDSL" SSID From Router

If you are the kind of person who wants total control over devices you own, we share something in common. One of the things I noticed about PLDT's new router is that they have somehow locked the SSID prefix to "PLDTHOMEDSL" and they leave you to figure out the rest of the strings that follow.

I don't appreciate what they did with that.. Aside from not having control over the SSID, it opens up security holes in your wireless network. Why? It is because persons who scan the wireless network know that you have a PLDT router without having to take a second guess. And yes, there are vulnerabilities to the router that make it easy for outsiders to connect and break security protocols in place. I won't go into details, but I know for certain that there is and I guarantee that.

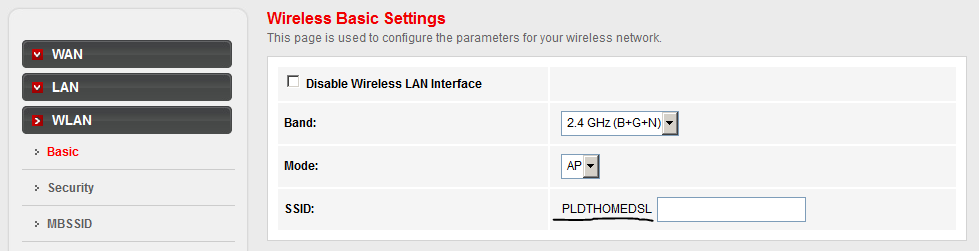
Just so you have an idea what I'm talking about, on the configuration interface of your router this is what it looks like (see screenshot below).
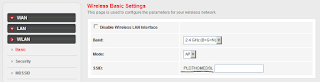
PLDTHOMEDSL Locked SSID

So why not rename the SSID instead? They locked the interface for you to be able to do it. But this post is here to discuss the workaround to it.

On the same web configuration interface, go to "Maintenance", and save (or "Backup") the current configuration to a file. For all intents and purposes, lets save this file to the Desktop (it will be named "config.img" by default).
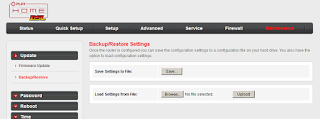
Backup Settings to File

Open the config.img file with your favorite text editor. Look for the line that contains the string "WLAN_ROOT_SSID". On my editor it is on line #27 of the file.

WLAN_ROOT_SSID

Change the string between quotes to the SSID of your choosing. Save the file.

Related: Network Profiler and Analyzer

Head back to the web configuration interface and "Load Settings from File". Give it the config.img file that was just modified and hit "Upload". The router will then reboot to reflect the new settings.

Once the router reboots, its SSID will now be the new SSID you assigned. Be careful as any change you make to the configuration resets it back to "PLDTHOMEDSL" and you will have to redo this procedure.

Hope this helps.
Share:

HOW-TO: Automatically Disable WIFI on LAN Connectivity

Wifi networks are just about everywhere. In this digital age, being offline is tantamount to living in the stone age. Little do people know, the abundance of Wifi signals in the environment causes a lot of headaches. The signals coming from both the devices and the Wifi infrastructure cause a lot of unseen interference. Leaving devices with inherent wireless connectivity online, while unused, contributes to that phenomenon. As the interference increases, performance worsens.

If you ask me, I prefer to be connected wired rather than wireless. Wired connectivity is stable, and if you really want performance -- it is way faster. Imagine comparing the fastest wireless (Wireless N), at 300MBps with the fastest wired (Gigabit Ethernet) at 1GBps. Enterprise wired networks could go as fast as 10GBps. Not to mention, the 300MBps wireless speed varies over distance and the density of connected devices on the wireless infrastructure.

One such device is your average notebook. It has both wifi and wired connectivity. I previously wrote about putting preference of Wired connectivity over Wifi, if both are available. Now, I'd like to write about automatically shutting down the wireless interface when the wired interface is connected. It is also possible to automate the enabling of the wireless interface once the LAN is disconnected.

As I am still on Windows 7, the screenshots are based on the Windows 7 interface but the procedure is applicable to modern variants of Windows. Let's dive into the nitty gritty details.

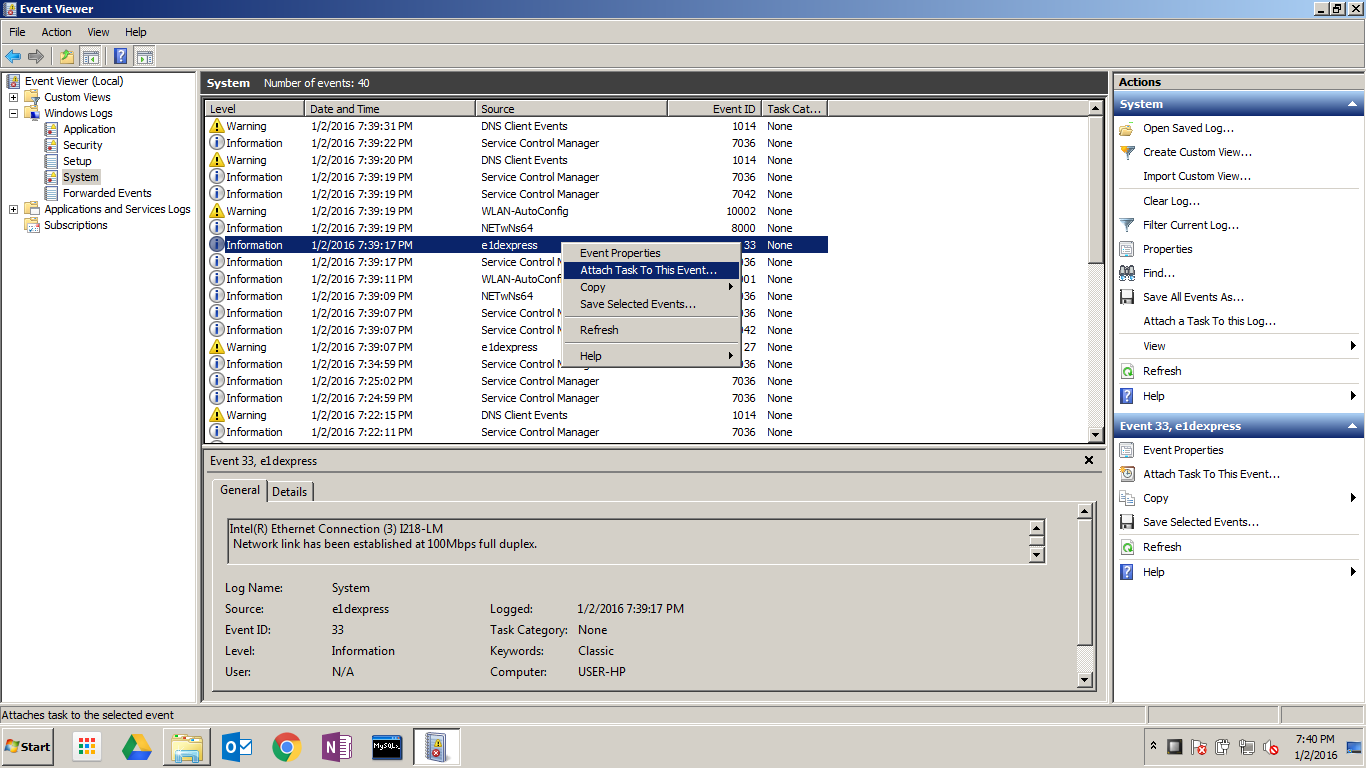
Open the native Windows "Event Viewer" and browse to Windows Logs --> System. Create events of the LAN interface connecting and disconnecting by physically connecting and disconnecting the LAN cable. Pressing "Refresh" on the right panel will show the recent events. On my notebook, the EventIDs are #33 and #27 for connections and disconnections, respectively.

Highlight an EventID #33 and select "Attach Task To This Event.." (as seen on the screenshot below).

System Event Logs

Put an appropriate name to the Task. Description is optional, but put one in anyway. Next..

Create Basic Task

Nothing to do in the next Window as everything is greyed out.. Next..

Just Hit Next..

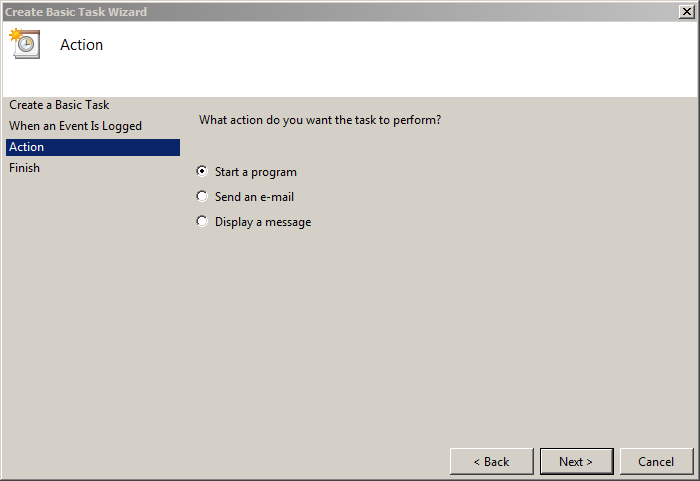
Accept the default action of "Start a program". Next..

Start a program

The program to start is "C:\Windows\system32\netsh.exe". For the arguments, add:
interface set interface "Wireless Network Connection" disable

NETSH.EXE

Hit Next.. and Finish.

Hit Finish

Run this task as "NTAUTHORITY\SYSTEM" and tick "Run with highest privileges".

Modify Settings

Do the same exact procedure for EventID #27, but this time it will automate the enabling of the wifi adapter. Change the netsh.exe arguments to:
interface set interface "Wireless Network Connection" enable

I have done this tweak successfully on an older Lenovo T420, a Lenovo X240, a Dell D620 and an Elitebook 820. All I watched for were EventID #33 and EventID #27 on the System Event Logs. Yours may be different. The events for docking the notebooks differ by models. Those could be added as triggers.


Share:

TWEAK: Prefer Wired over Wireless Connection in Windows 7

How are you connected to the network or the intranet? Wired? Wifi? Both? Nowadays, it is no longer uncommon to find laptops or notebooks being used in modern offices. These devices are equipped to both be a workstation and a mobile platform at the same time. Its portability with matching punching and crunching power could give most desktops a run for its money.

Going back to the question above, how about if the laptop is connected wired and wireless to the local area network? Which connectivity takes precedence? The answer to this question seems insignificant.. but try transferring large files across the network -- you will then start to notice the difference in speed.

The previous generation networks were 100Mbps for wired (Fast Ethernet) and 54Mbps for wifi (Wireless G) -- the gap is a bit close. Today's generation of networks are 1Gbps for wired (Gigabit Ethernet) and 300Mbps for wifi (Wireless N) where the disparity is every evident. So when connected at the same time, it is important to prefer the faster Gigabit Ethernet over Wireless N.

To configure this to be the default behavior, open the Network Connections. You can get to this in a different number of ways. One, Start -> Search programs and files for "Network Connections" and open "View Network Connections" (under Control Panel). Another would be to right click on the network access icon on the system tray -> Open Network and Sharing Center -> Change adapter settings. Either of the above will get you to the window similar to below.

Network Connections


Press ALT to show the menu's and select Advanced -> Advanced Settings..


Network Advanced Settings


As you can see, the default behavior is Wireless Network Connection first, before Local Area Connection. If you notice the line above the list box, it says "Connections are listed in the order in which they are accessed by network services." The default preference is the wireless connection, which is usually the slower more unstable connection.

Notice too the arrows right next to the list box. From there, you can set the preferences. You can move Local Area Connection on top of the list so that the faster, more stable wired connection gets preference over wireless. This way, whenever both connections are present, wired gets priority over wireless.

Network Advanced Settings


Experiment on your end and see the difference in performance. In my experience, I got about 8.3MB/s copy speed over Wireless N compared to about 11MB/s on Fast Ethernet. Even the newer fatter wireless bandwidth could not cope with Fast Ethernet speeds in throughput. Gigabit finished quickest at about 54MB/s but this may be the harddrive limiting the speed.

I also believe this should be the default setting right out-of-the-box. Not sure why Microsoft configured Windows 7 to behave this way. Given that, I'm inclined to say Windows XP would have a similar behavior and a likewise similar tweak.

Share:

TIP: Backup Wireless Network Settings (Windows 7)

One of the many advantages of Windows 7 over its predecessors is the wide array of options in backing up the system. Already inherent in its line-up of tools is the capability to create its own repair disc. But the most overlooked capability, which I think is just as useful, is the capacity to backup wireless settings.

This feature can be beneficial to you in two ways -- a backup of the configuration and a way to share wireless network configuration to another computer. Since it can backup the wireless network security key, it also serves as a way to recall the that key.

In order to create a backup of the wireless settings, go to Start --> Control Panel --> Network and Sharing Center (if using the view by icons). If your Control Panel is displayed in Category view, choose Network and Internet --> Network and Sharing Center. A similar window like below is displayed.

Backup Wireless Network Settings Windows 7

Click on Manage wireless networks (on the top left column).

Backup Wireless Network Settings Windows 7

You will be shown a list of wireless network infrastructures or ad-hoc networks that your computer can connect to. Double-click the wireless network you wish to backup.

Backup Wireless Network Settings Windows 7

Next, click on "Copy this network profile to a USB flash drive".The backup process requires a USB flash drive (UFD) to write the configuration files to. If your computer doesn't have one, you may plug one in. Then, click "Next".

Backup Wireless Network Settings Windows 7

A few files will now be written on the UFD. The files "AUTORUN.INF" and "setupSNK.exe" are now present on the UFD, together with the directory "SMRTNTKY". These files contain the backup of the wireless network settings of the computer system.

You may choose to plug the UFD on another computer and run the executable "setupSNK.exe" to configure that computer to use the same wireless network settings as the original computer. This way you have imported the wireless network settings to another computer without having to do much work.

Backup Wireless Network Settings Windows 7

Since the UFD already contains a copy of the wireless network settings, it is a backup that you can secure in a safe place. You might be needing it one way or another in the future.

Share:

Subscribe for Latest Update

Popular Posts

Post Labels

100gb (1) acceleration (1) acrobat (1) adblock (1) advanced (1) ahci (1) airdrop (2) aix (14) angry birds (1) article (21) aster (1) audiodg.exe (1) automatic (2) autorun.inf (1) bartpe (1) battery (2) bigboss (1) binance (1) biometrics (1) bitcoin (3) blackberry (1) book (1) boot-repair (2) calendar (1) ccleaner (3) chrome (5) cloud (1) cluster (1) compatibility (3) CPAN (1) crypto (3) cydia (1) data (3) ddos (1) disable (1) discount (1) DLNA (1) dmidecode (1) dns (7) dracut (1) driver (1) error (10) esxi5 (2) excel (1) facebook (1) faq (36) faucet (1) firefox (17) firewall (2) flash (5) free (3) fun (1) gadgets (4) games (1) garmin (5) gmail (3) google (4) google+ (2) gps (5) grub (2) guide (1) hardware (6) how (1) how-to (45) huawei (1) icloud (1) info (4) iphone (7) IPMP (2) IPV6 (1) iscsi (1) jailbreak (1) java (3) kodi (1) linux (28) locate (1) lshw (1) luci (1) mafia wars (1) malware (1) mapsource (1) memory (2) mikrotik (5) missing (1) mods (10) mouse (1) multipath (1) multitasking (1) NAT (1) netapp (1) nouveau (1) nvidia (1) osmc (1) outlook (2) p2v (2) patch (1) performance (19) perl (1) philippines (1) php (1) pimp-my-rig (9) pldthomedsl (1) plugin (1) popcorn hour (10) power shell (1) process (1) proxy (2) pyspark (1) python (13) qos (1) raspberry pi (7) readyboost (2) reboot (2) recall (1) recovery mode (1) registry (2) rename (1) repository (1) rescue mode (1) review (15) right-click (1) RSS (2) s3cmd (1) salary (1) sanity check (1) security (15) sendmail (1) sickgear (3) software (10) solaris (17) squid (3) SSD (3) SSH (9) swap (1) tip (4) tips (42) top list (3) torrent (5) transmission (1) treewalk (2) tunnel (1) tweak (4) tweaks (41) ubuntu (4) udemy (6) unknown device (1) updates (12) upgrade (1) usb (12) utf8 (1) utility (2) V2V (1) virtual machine (4) VirtualBox (1) vmware (14) vsphere (1) wannacry (1) wifi (4) windows (54) winpe (2) xymon (1) yum (1) zombie (1)

RANDOM POSTS