Showing posts with label usb. Show all posts

HOW-TO: Create a USB VMware ESXi 5 Installer

Not all servers are created equal -- some have optical drives, some don't have. Given that, there might be times where you will be needing an alternative way of installing operating systems to that server. In the case of a VMware ESXi 5 hypervisor, the installer has a smaller footprint compared to most operating systems but, nevertheless, without any optical drive on the server the only other alternative is to install via USB.

This is not rocket science. USB installers are in fact a bit common nowadays. We have covered several how to's including the install of Windows 7 via USB. Aside from Windows, almost all flavors of Linux can be installed via USB, although the network install of Linux is the most prefered.

To create a USB installer, you will be needing the latest VMware ESXi ISO image from VMware. It needs a registered account to be able to download the ISO file. Register as it will be worth it.

Aside from the ISO file, you will also be needing the UNetbootin application. You may visit its sourceforge project page here. The current version of UNetbootin as of this writing is 5.81.

With the pre-requisites satisfied, launch UNetbootin. Tick on "Diskimage", select "ISO" on the dropdown (this is the default selection), and browse the location of the downloaded VMware ESXi 5 ISO file. You should have a Window similar to this (see below).

UNetbootin Start Window

Double check and ensure that the right USB drive is selected. Hit "OK" and watch UNetbootin build the USB installer.

UNetbootin Building

When UNetbootin installs the Bootloader (STEP#3), you will be asked to overwrite a file -- MENU.C32 -- accept that dialog. This is the only interaction that happens during the build. Everything else is automatic.

Upon completion, simply press "Exit". There is no need to reboot.
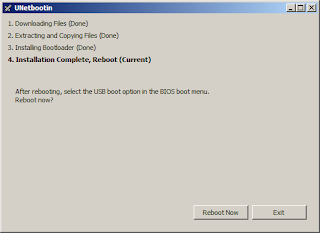
UNetbootin Done

The only caveat I have encountered on this build is that the USB drive used was formatted NTFS. This doesn't work so early on, you need to format the USB drive with a FAT32 filesystem. This solved a few headaches for me.

Share:

HOW-TO: Resolve "BOOTMGR is missing" Boot Error

Further experimentation(s) with BartPE and cloning sysprep-ed Windows 7 SP1 systems led me to further problems. My interest and expertise in these cloning mechanisms and hands-free installs are for Solaris and Linux, not Windows so I was scratching my head for a while trying to resolve the problem.

It is a bit difficult to find a working resolution on the internet so after a while I got tired of searching for a way to migitate the problem and resorted to trial and error. Below is the procedure that eventually worked for me.

The dreaded error:
BOOTMGR is missing.
Press ctrl+alt+del to restart

On the system that encountered this error insert the Windows 7 installation DVD. If you have a Windows 7 USB installer, that works just fine.

Either bootable media works. On the first screen that is presented, select the Language, Time and Currency and Keyboard input method. Then, click Next. You will be on a screen like the one below.

BOOTMGR is missing Boot Error

On the screen above, click on "Repair your computer". The built-in recovery software will try to detect the installed version(s) of Windows. Select the appropriate operating system from the list. Usually there is only one listed here just click on it to highlight the selection and click on Next.

Another window will open presenting system recovery options. Refer to the screenshot below.

BOOTMGR is missing Boot Error

Select command prompt (toward the bottom). And a command window will open.

Rebuild the bcd directory via "bootrec /rebuildbcd" on the command prompt. And restart your computer. This should resolve the "BOOTMGR is missing" boot error (The bootrec command is explained in greater detail on Microsoft: KB927392).

Executing the above procedure solved my problem. Discipline urged me to create a backup of my old boot configuration data (BCD), but I didn't do it anymore.

Just to be on the safe side, if you wish to save a backup of the BCD, you can execute "ren d:\boot\bcd d:\boot\bcd.old" prior to running "bootrec /rebuildbcd".

Share:

FAQ: BartPE/WinPE On USB Error

"There’s No Such Thing As A Silly Question" -- does the cliche sound familiar? In this part of pimp-my-rig reloaded, technical questions are answered. Mail them to me and I will post the answers here. If you have a better answer, by all means share it with us.

While trying to build BartPE earlier this week, I was perplexed at the problem that got me stuck. I know I had encountered this before, and not having to work with Windows for quite a while, I could no longer recall what I did in the past. This seems to be a common problem on forums and I have helped a lot of people stuck in this problem before.

To give you a better picture, I built BartPE for USB using PE2USB. After being successful at building the USB, I plugged it on the computer to be cloned and.. ERROR!

Remove disks or other media. 
Press any key to restart.

The USB device seems to be ok, as I tried it with other computers. So I rebuilt the BartPE using PE Builder. Same result. The same error results regardless of whether the source is Windows XP Pro SP3 or Windows Server 2003 SP1.

It seems that the common denominator is the Windows 7 on the Thinkpad and the Windows 7 on the desktop. So I tried the build on a VirtualBox Windows XP Pro SP3. The same exact procedure I followed to build resulted in success.

And it hit me -- the bootsectors or boot code written by Windows 7 is different from Windows XP. When using Windows 7 on your machine and building BartPE or WinPE 1.x, you have to write a version 5 boot code (NTLDR) on the USB flash drive. Native Windows 7 format utilities default to version 6 (BOOTMGR) boot code. And this results in errors when booting an XP-based WinPE/BartPE.

BartPE WinPE on USB Error

As seen above, the bootsect.exe was able to write version 5 bootcode to the USB flash drive and I was able to boot to BartPE without errors.

The reverse applies to Windows XP machines creating WinPE version 2 or version 3. You will have to run bootsect.exe to put version 6 boot code to the USB flash drive to properly boot.

The standalone file bootsect.exe can be downloaded from here. Don't worry it is virus-free and runs regardless of whether your version of Windows is 32-bit or 64-bit.

Share:

FAQ: Mouse Randomly Freezing on Windows 7

"There’s No Such Thing As A Silly Question" -- does the cliche sound familiar? In this part of pimp-my-rig reloaded, technical questions are answered. Mail them to me and I will post the answers here. If you have a better answer, by all means share it with us.

Q. I recently encountered something that was both weird and quite disappointing -- my mouse started freezing randomly and it did so at times when it mattered the most. This can be annoying at times. Searching for solutions on the internet was a bit futile and I also learned that a lot of people have been complaining about this problem for years now. Their petitions to Microsoft seem to have fallen on deaf ears.

A. The only other alternative was to use a PS/2 mouse, which I don't have. I remember having a USB to PS/2 converter packaged with my Logitech MX518 Optical Mouse but since I bought it years ago I can't recall where that adapter is now.

I have to make this mouse work without having to resort to buying another one. I know it works since I tested in on my notebook (running on XP) and it doesn't exhibit the same random freezing.

A friend recently gave me this tip for me to try out. It involves making changes to the registry. Before proceeding heed this warning. WARNING: Changes to the registry can render your system unusable. Be warned that changes to the registry can be harmful to your system. But when done right, you can fix the random freezing of your mouse.

Now that you have been warned, open the registry editor Start -> Run.. -> regedit. Browse over to HKEY_LOCAL_MACHINE\SYSTEM\CurrentControlSet\Enum\HID. Under this branch of the registry you will see keys starting with VID, which we can't comprehend.

To make life easier, right click on HID and select Find. You will see a similar window as the screenshot below.

Mouse Randomly Freezing on Windows 7

Look for the entry "Mouse". You will find it under VID branch having a key that starts with "6&XXXXX" (see below). This string might be different on your machine. This screenshot is for my Logitech MX518 Optical Mouse. If you have the same mouse, the key could be the same -- 6&c111417&1&0000.

Mouse Randomly Freezing on Windows 7

Under the 6&XXXXX branch is another key "Device Parameters". Under this key add as DWORD "HScrollHighResolutionDisable" and give it a value of "1". Add another DWORD "VScrollHighResolutionDisable" and similarly give it a value of "1".

Mouse Randomly Freezing on Windows 7

Close the registry editor and reboot. Then check if this solves the random freezing of your USB mouse. You may consider looking for other values of "Mouse" on the HID registry key and repeat the process. On my desktop, the "Mouse" entry appeared only once. For a week now, my mouse has been freeze-free.

Share:

HOW-TO: Build an Ultimate Boot USB

Disaster strikes when you least expect it. It can range from a simple boot block corruption to a completely unbootable system, and even worse a virus infection. It is vital that you are able to correctly diagnose the problem with a few recovery tools at your disposal. This is where the Ultimate Boot CD (or UBCD) and the My7PE come in very handy.

So whether you are using My7PE or UBCD, and have an ISO it is still useless without an optical drive to use. But what's handy is a USB flash drive. It is notably faster than a CD or DVD drive. And it is cheap and just about every computer out there comes with a USB port. While the optical disc is not that expensive, not every PC or notebook comes with it by default. And for the price of an optical drive, you can buy a bigger capacity USB flash drive. Practical, economical and handy.

You can choose to build My7PE or download the Ultimate Boot CD for this project. Then you can use the Universal USB installer to transfer the contents of the ISO to a USB drive.

My7PE. It is a bit difficult to obtain the latest script to build a My7PE nowadays. But if you have a resource where you can obtain the latest version, share it with us. As of this writing I'm not sure whether the version I have is the latest one but when used, the ISO it builds still works.

Use the script to build the ISO and remember to note its location. The ISO is very important in the later part of the build. You will need to point the Universal USB Installer to where the ISO is located (like below).

Build an Ultimate Boot USB

This USB Installer can also create a Windows 7 installer on USB. So this tool can be used in conjunction with our previous tutorial on making a USB Windows 7 Installer.

Ultimate Boot CD (UBCD). UBCD has an assortment of tools to diagnose problems with your computer. You can further customize this to suit your own needs. The UBCD website has a very good tutorial in customizing UBCD.

Then build the ISO and use it with the Universal USB Installer. Or you may just choose to use the original version which can be obtained here. Remember to set the dropdown menu (step#1) to "Ultimate Boot CD".

Build an Ultimate Boot USB

You just transformed the Ultimate Boot CD to become the Ultimate Boot USB.

Share:

TIP: Create Windows USB Installer using WinToFlash

Whoever predicted the eventual demise of the floppy drive was right. It is seldom used these days that to see one on a computer system characterizes its age. Nowadays, optical drives are used to contain installers. But the trend seems to be going to the direction of flash media in the form of USB flash drives (UFD). This is reasonable as UFD access times are much faster compared to optical drives. The only area where optical media seem to have an advantage is long-term storage and data archives.

While on this subject, we had previously outlined a procedure in installing Windows 7 using a UFD. Another way to transfer the files to the UFD is through WinToFlash. WinToFlash is not limited to creating a USB installer, it can also format, check for errors, and copy WINPE files to the UFD.

So download and install WinToFlash. Its wizard shows you this interface.


There is a catch though, WinToFlash could not format to NTFS. So we have to format the UFD to NTFS first. You can do this the diskpart way or via the unplug policy as outlined in our other articles.

Point the source to the path where Windows 7 installer resides. This can also be the DVD, the ISO, Windows 7 Unified Installer created earlier, or the WINPE source. Do the same for the target UFD or USB hard drive.

On the "Process" tab, untick the "Format drive" option as we need the UFD formatted to NTFS. The option "Check USB drive for errors" will not work for free users. So leaving it ticked or unticked doesn't really matter much.

All that is left is to click "Run". The copy process will begin and a prompt will be given when done.


While we were playing with WinToFlash, we noticed that it works like rsync. Where, if the file is not modified from source and if the same file exists in the target directory, it will no longer be copied (again). This in turn saves you time and energy and write cycles on your UFD. Very efficient indeed!

While the ads are a bit cumbersome, WinToFlash has its uses and is implemented in a clever manner. So go ahead and add it to your arsenal of toolkits. We'd like to have a portable version of this app though.

Share:

MODS: Infinite USB Plug Redesign

I was doing a research and comparison of backlit keyboards when I stumbled across this USB design whose concept is quite unique. The designer, Gonglue Jiang, calls it "Infinite USB" (source: Yanko Design).

One of the limitations on notebooks is the lack of USB ports in proportion to the number of devices we would like to hook up. An easy remedy these days is the USB Hub, but YD won’t be YD if we showcased run-of-the-mill solutions! So here’s the Infinite USB -- an alternative plug on devices that kinda acts like a tag team. The design speaks for itself, so no point elaborating, however what we can do is talk about its effectiveness and limitations. For starters I don’t think we may be able to tag too many devices one behind the other. I reckon max 3 or 4 before the tag starts to look awkward, but the color coding on plugs will make it easy to identify which plug belongs to which device.

The concept is made more profound by pictures of the design itself.

Infinite USB Plug Redesign

While the idea is exceptional it has its own limitations. For one, the USB port taps out at around 500mA (maybe higher for USB 3.0) only. So the number of devices will be limited by this specification. That will be to the detriment of the "infinite" moniker.

This makes more sense in plugging quasi-permanent USB devices like mice and keyboards, not removable ones. Imagine chaining just two USB flash drives. In order to unplug the second link on the chain, the first one has to be unplugged first.

The concept is quite good and innovative. It will definitely have its uses. As it seems the manufacturing sector has not caught up on the design as I have yet to see this on USB devices. While it may be out there, it is not being mass produced.

Infinite USB has its limitations and the infinite on the name definitely got my attention and admiration (and criticism).

Share:

HOW-TO: Install Windows 7 Using a USB Flash Drive

On an earlier how-to, was posted a tutorial on how to unify Windows 7 x86 and x64 installers into one DVD (or one DVD image). However, not all computer systems nowadays come with an optical drive -- like the DVDs or the more advanced Blurays -- but most computer systems have USB ports.

Even though the desktop comes with an optical drive, one could not deny the fact that USB ports transfer data faster than optical drives. If so, then why not create an installer that plugs on the USB port right? That is indeed a good idea.

This procedure requires the following items (only one of the items marked by ** are required):
  • Windows 7 x86 [32-bit] DVD (or ISO) **
  • Windows 7 x64 [64-bit] DVD (or ISO) **
  • Unified Windows 7 Installer DVD (or ISO) **
  • a USB flash drive (at least 4GB in size)

Another thing to note here, is that this procedure can be done for any of the following sources: Windows 7 x86, Windows 7 x64 or the unified installer for both x86 and x64 Windows 7.

Follow the procedure below:

[1] Prepare a USB flash drive (UFD). Format it to NTFS. If the option for NTFS is not available, perform any of the following: using diskpart or tweak the unplug policy. For some strange reason, the installer requires an NTFS filesystem. I tried this on FAT32 and the installer will not work but does on NTFS.

[2] If you still have the D:\WIN7 directory structure from the older tutorial, simply copy the contents of D:\WIN7\x86\ over to the UFD.
--or--
[2] If you have the individual Windows 7 x86 or Windows 7 X64 installers, copy the contents of the DVD (or ISO) to the UFD.

[3] Open a command prompt as Administrator. Change directory to the \boot of the DVD or if using the unified installer D:\WIN7\x86\boot. Execute "bootsect /nt60 G:" (like below).


[4] You now have a USB capable of installing Windows 7. Try it out on another machine and prove to yourself the improvement in speed when installing from UFD.

USB install is versatile and fast. Not only that, our previous procedure unifying the installers can be put to a single 4GB USB flash drive. Another upside to this is carrying a UFD is much better than carrying a DVD -- it can even fit in your pocket!

Share:

HOW-TO: Format USB Flash Drives to NTFS

By default, Windows doesn't allow USB flash drives (in this document we will shorten its name to UFD) to be formated to NTFS. I'm quite puzzled by this myself but as this is the default behavior, you will need to discover and study a bit more in order to get the functionality you require. Further research brought the realization that this limitation only exists on the GUI. If you are used to the *nix systems command line coding, this will suit your taste quite well.

Diskpart is an integral part of Windows, a command line utility to partition disks -- quite similar to fdisk of the Linux world. While this is not a full-blown command-line coding like *nix, it is a bit similar in a sense. Enough talk.. on to the meaty details of diskpart.

Plug the UFD on an available USB port and launch "cmd.exe" as Administrator. You will know that the command tool ran as Administrator due to the "Administrator" tag on the upper left corner of the window (see below).


The procedure below should be done on the cmd.exe window as posted above. The "DISKPART>" prompt is provided for illustration purposes to show that the commands used need to be executed inside th diskpart shell (in performing the procedure, skip the "DISKPART>" portion when copying and pasting).

[1] Launch diskpart. On the command tool key-in "diskpart" (or "diskpart.exe").

[2] On the diskpart prompt, key in "DISKPART> list disk". The last one should be the UFD. You may also check the size column just to be sure. Then select that disk by "DISKPART> select disk 1". If you have many disks select the appropriate number "disk X", where X is the disk number.

[3*] (optional) You may choose to clean the disk partitioning information using "DISKPART> clean". This will delete everything in the drive so be careful! A prompt of successful cleaning will follow.

[4*] If you skipped STEP#3 above, you already have a partition on the UFD. Create a partition on the disk. Use command "DISKPART> create partition primary". Verify that a primary partition exists using "DISKPART> list partition".

[5] Then select the newly created partition using "select primary 1".

[6] Mark the partition active through command "DISKPART> active". When you list the partitions, the "*" (asterisk) before the partition number indicates that the partition is active.

[7] Format the UFD, "DISKPART> format fs=ntfs" or "DISKPART> format fs=ntfs quick".

[8*] (optional) If you wish to assign a drive letter to the UFD, use "DISKPART> assign".

[9] Exit the diskpart utility. "DISKPART> exit".

Yes, the command line utility is really cool. It can give you the flexibility you need if the GUI doesn't give room for it.

Typing the commands above can be excruciating and tiring if you're not used to it. Don't worry about this though as you can shorten the commands. You may key-in the first three letters of the command.

For example, instead of "DISKPART> list partition" you may use "DISKPART> lis par". The commands execute the same set of instructions and is less of a hassle to type.

To get a better explanation of what a particular command does, you can always use help (DISKPART> help select).

This procedure is easy to execute on a computer system with only a system drive and UFD. On a system with multiple disks and UFDs this can be really risky.

Share:

ARTICLE: Unified Windows 7 Installer for x64 and x86

As processor technology continues to progress, the inverse is true x86 (or 32-bit) version of Windows -- the need for it has regressed. But for some, the 32-bit Windows still is has its uses. Netbooks will probably put it to good use for quite some time in the foreseeable future, while modern and powerful desktops come bundled with a x64 (or 64-bit) versions of Windows.

So having the requirement for both versions, so does the need to keep installers for both versions. Why not just bundle and keep one installer for both?

For all intents and purposes, let us assume that the working directory for our example is D:\WIN7 and the files for the x86 and x64 will be copied to subdirectories under the directory of D:\WIN7 -- meaning D:\WIN7\x86 and D:\WIN7\x64 respectively.

This procedure requires the following items:
  • Windows 7 x86 [32-bit] DVD (or ISO)
  • Windows 7 x64 [64-bit] DVD (or ISO)
  • imagex.exe (part of Windows 7 AIK)
  • ISO maker (e.g. cdimage.exe or oscdimg.exe)

Here's how to transform two installers to one.

[1] As stated above, create the folders D:\WIN7\x86 and D:\WIN7\x64.

[2] To make things simpler, copy imagex.exe to D:\WIN7. This will save you from a lot of typing.

[3] Copy the contents of the x64 DVD (or ISO) to D:\WIN7\x64. Do the same for x86 DVD (or ISO) but the intended target directory is now D:\WIN7\x86.

[4] Open a command prompt with Administrator privileges. On the Start menu search bar, key in Command and right-click Command Prompt to run it as Administrator. This is important, run cmd.exe as Administrator.

[5] Run the following commands to merge the installer. You may use the full path of imagex.exe or the relative path, whichever works for you.
  • imagex.exe /export "D:\WIN7\x64\sources\install.wim" 1
    "D:\WIN7\x86\sources\install.wim" "Windows 7 HOMEBASIC x64"
  • imagex.exe /export "D:\WIN7\x64\sources\install.wim" 2
    "D:\WIN7\x86\sources\install.wim" "Windows 7 HOMEPREMIUM x64"
  • imagex.exe /export "D:\WIN7\x64\sources\install.wim" 3
    "D:\WIN7\x86\sources\install.wim" "Windows 7 PROFESSIONAL x64"
  • imagex.exe /export "D:\WIN7\x64\sources\install.wim" 4
    "D:\WIN7\x86\sources\install.wim" "Windows 7 ULTIMATE x64"

[6] Explore to the D:\WIN7\x86 folder and delete the file "ei.cfg" file. If the following files exist: "install_Windows 7 HOMEBASIC.clg", "install_Windows 7 HOMEPREMIUM.clg", "install_Windows 7 PROFESSIONAL.clg", "install_Windows 7 STARTER.clg" and "install_Windows 7 ULTIMATE.clg", delete them as well.

[7] Copy the file etfsboot.com from D:\WIN7\x86\boot to D:\WIN7. Simply using the file D:\WIN7\x86\boot\etfsboot.com as bootsector when making the ISO will generate errors.

[8] Create the ISO (assuming you got Command prompt in D:\WIN7).
oscdimg.exe -l GRMCULFRER_EN_DVD -m -betfsboot.com -n -h D:\WIN7\x86 WIN7AIO.ISO


Test the newly created ISO in VirtualBox or VMware. Save yourself the cost of a DVD media by testing the ISO first before finally burning the image to a blank DVD. Or if you have a DVD-RW media, you may opt to burn the media and test it on your computer.

On VMware, the installer should be showing something like this.

Unified Windows 7 Installer for x64 and x86


You may use the all-in-one ISO to create a USB all-in-one installer too.

Share:

HOW-TO: Disable USB Storage Devices

IT infrastructure engineers install firewalls to protect the intra-net from outside. Mail filters on SMTP servers are there to protect users from SPAM. Anti-virus software are deployed to further boost protection on the workstation itself. Regardless of whatever software or hardware is put in place, it serves to beef up security.

One of the many open portals or backdoors that may compromise the infrastructure as a whole is the USB port. Why?.. because USB portable storage devices are probably the next best thing since sliced bread in the storage world -- portable, handly, concealable, you name it. As many as its advantages are its disadvantages. To secure the infrastructure, the access to the USB port needs to be restricted. But how?

A year ago 1GB seemed to be a lot, but 2GB is even frowned upon now. This topic is a bit old.. But still the threat is out there in the open. And the issue is still a hot topic for debate. There is a lengthy instruction on how this can be done but there is no concrete solution that permanently works. Even microsoft has published a lengthy procedure that outlines how this is done.

The procedure outlined in the microsoft KB article, suggests the denial of permissions on the two files responsible for the installation of drivers and services for USB storage functionality.
%SystemRoot%\Inf\Usbstor.pnf
%SystemRoot%\Inf\Usbstor.inf

The deny permission is important especially if the users are non-administrators. The mentioned files could also be renamed, but it needs to be noted so that the procedure can be reversed if need be.

Aside from the above, the registry needs to be checked for this key:
HKEY_LOCAL_MACHINE\SYSTEM\CurrentControlSet\Services\USBSTOR

The value for the data key "Start" should be set to 4 (or Disabled) from 3 (or Automatic). The value determines whether the driver is loaded or not when Windows starts. A reboot will be required after the changes.

But for a person who wants a click and go solution, one may want to try another utility to achieve the same purpose. You may download the utility from the author's website.


The click and go solution can also quickly reverse the procedure to enable USB storage devices. The only thing it cannot do is work around the required reboot.

Tighter security always sacrifices functionality. As usual, the goal is to strike a balance between the two. But when it comes to the balance and trade-offs, it is always a grey area.

Share:

HOW-TO: Mount USB Thumbdrives in Solaris

USB thumbdrives have become mainstream. And most of the portable tools and utilities are stored in them. This is true for both Windows and Unix/Linux. But I recently was asked a question on how to mount USB thumbdrives in Solaris. Indeed, how is a thumbdrive mounted in Solaris?

Aside from the knowledge of mounting the USB thumbdrive, a more important question arises -- where is it mounted? These questions presume that Solaris supports thumbdrives and indeed it does, as we shall see in a bit.

Mount the USB thumbdrive. USB thumbdrives are emulated as SCSI hot-plug devices. They are under the control of the Solaris Volume Management daemon "vold". The same daemon is responsible for the floppy and CD/DVD optical devices.

Plug the drive to the USB port. Become super-user (root) or a privileged user (via sudo). The rest of the commands need elevated privileges. To check if the USB thumbdrive is detected, use cfgadm.
root@host # cfgadm
...
...
usb0/2.0 usb-storage connected configured ok
...
...

The output above confirms that the USB thumbdrive is properly detected by the system.

The directory /rmdisk does not exist on a Solaris system by default. So it needs to be created.
root@host # mkdir /rmdisk

With the /rmdisk directory existing vold needs to be restarted, if it is started.
root@host # pkill -HUP vold

.. or started, if disabled.
» for Solaris 10
root@host # /etc/init.d/volmgt start

» for older Solaris versions
root@host # /etc/init.d/vold start


Verify that the device is found by vold.
root@host # volcheck -v
media was found

The USB thumbdrive is now mounted in /rmdisk/rmdisk0.

Unmount the USB thumbdrive. Just like in Windows, the thumbdrive needs to be unplugged or unmounted properly.

To unmount the thumbdrive, run the command below:
root@host # volrmmount -e rmdisk0

Verify that the device is no longer detected by the system.
root@host # volcheck -v
no media was found

There you go, the mounting and unmounting of a USB thumbdrive in Solaris. I hope this post answers the questions you may have about thumbdrives in Solaris.

Thumbdrives can be useful in Solaris as well.

Share:

Subscribe for Latest Update

Popular Posts

Post Labels

100gb (1) acceleration (1) acrobat (1) adblock (1) advanced (1) ahci (1) airdrop (2) aix (14) angry birds (1) article (21) aster (1) audiodg.exe (1) automatic (2) autorun.inf (1) bartpe (1) battery (2) bigboss (1) binance (1) biometrics (1) bitcoin (3) blackberry (1) book (1) boot-repair (2) calendar (1) ccleaner (3) chrome (5) cloud (1) cluster (1) compatibility (3) CPAN (1) crypto (3) cydia (1) data (3) ddos (1) disable (1) discount (1) DLNA (1) dmidecode (1) dns (7) dracut (1) driver (1) error (10) esxi5 (2) excel (1) facebook (1) faq (36) faucet (1) firefox (17) firewall (2) flash (5) free (3) fun (1) gadgets (4) games (1) garmin (5) gmail (3) google (4) google+ (2) gps (5) grub (2) guide (1) hardware (6) how (1) how-to (45) huawei (1) icloud (1) info (4) iphone (7) IPMP (2) IPV6 (1) iscsi (1) jailbreak (1) java (3) kodi (1) linux (28) locate (1) lshw (1) luci (1) mafia wars (1) malware (1) mapsource (1) memory (2) mikrotik (5) missing (1) mods (10) mouse (1) multipath (1) multitasking (1) NAT (1) netapp (1) nouveau (1) nvidia (1) osmc (1) outlook (2) p2v (2) patch (1) performance (19) perl (1) philippines (1) php (1) pimp-my-rig (9) pldthomedsl (1) plugin (1) popcorn hour (10) power shell (1) process (1) proxy (2) pyspark (1) python (13) qos (1) raspberry pi (7) readyboost (2) reboot (2) recall (1) recovery mode (1) registry (2) rename (1) repository (1) rescue mode (1) review (15) right-click (1) RSS (2) s3cmd (1) salary (1) sanity check (1) security (15) sendmail (1) sickgear (3) software (10) solaris (17) squid (3) SSD (3) SSH (9) swap (1) tip (4) tips (42) top list (3) torrent (5) transmission (1) treewalk (2) tunnel (1) tweak (4) tweaks (41) ubuntu (4) udemy (6) unknown device (1) updates (12) upgrade (1) usb (12) utf8 (1) utility (2) V2V (1) virtual machine (4) VirtualBox (1) vmware (14) vsphere (1) wannacry (1) wifi (4) windows (54) winpe (2) xymon (1) yum (1) zombie (1)

RANDOM POSTS