HOW-TO: Tryout IPV6 via IPV6 Tunneling (Windows 7)

They say that most of the world will be connected via the global information highway or what is known as the internet soon. While technology is getting there, a burgeoning problem seems to emerge. The communication layer known as IPv4 (which we commonly know as the "IP address") will run out before that prediction ever becomes a reality.

Its successor -- IPv6 -- has been here for years now and while the world has not wholly embraced the technology in the literal sense of the word, it is "better" and will inevitably succeed IPv4 in the near future. In fact, most of the modern operating systems we commonly use support IPv6 protocols. So why not give it a spin to get a real experience with what it does, right? In a nutshell IPv6 is:

Internet Protocol version 6 (IPv6) is a version of the Internet Protocol (IP). It is designed to succeed the Internet Protocol version 4 (IPv4). The Internet operates by transferring data between hosts in small packets that are independently routed across networks as specified by an international communications protocol known as the Internet Protocol.

Each host or computer on the Internet requires an IP address in order to communicate. The growth of the Internet has created a need for more addresses than are possible with IPv4. IPv6 was developed by the Internet Engineering Task Force (IETF) to deal with this long-anticipated IPv4 address exhaustion, and is described in Internet standard document RFC 2460, published in December 1998.[1] Like IPv4, IPv6 is an internet-layer protocol for packet-switched internetworking and provides end-to-end datagram transmission across multiple IP networks. While IPv4 allows 32 bits for an Internet Protocol address, and can therefore support 232 (4,294,967,296) addresses, IPv6 uses 128-bit addresses, so the new address space supports 2128 (approximately 340 undecillion or 3.4×1038) addresses. This expansion allows for many more devices and users on the internet as well as extra flexibility in allocating addresses and efficiency for routing traffic. It also eliminates the primary need for network address translation (NAT), which gained widespread deployment as an effort to alleviate IPv4 address exhaustion.

-- taken from Wikipedia: IPv6

Philippines is one of those countries who have not implemented IPv6 just yet. ISPs here stick to IPv4. So if your current location has no support for IPv6, how do you take advantage of this technology? The answer is via IPv6 tunnelling. There are many ways of implementing tunneling. But here, we focus on gogo6 client. Download the required software from its webpage, then go ahead and install it.

Launch the gogoCLIENT utility. Under the "Basic" tab, tick Connect Anonymously and connect to server "anonymous.freenet6.net". You should be having a similar screenshot as below.


Now go to the "Advanced" tab. Set Tunnel Mode to "IPV6-in-UDP-IPV4 Tunnel (NAT Traversal)". Tunnel Authentication Mode should remain "Anonymous" (this is set to Anonymous by default).


Go back to the "Basic" tab and click Connect. You should be able to connect to the nearest freenet6 server on your current location. On the "Status" tab, you will be able to see connection details.


Once successful, your computer can now connect to multiple IPv6 websites. To test this, browse google's IPv6 search page via http://ipv6.google.com.

The above procedure is what I followed to get IPv6 working on my desktop. It is running Windows 7 x64 Ultimate. As always, your mileage may vary.

Share:

HOW-TO: Unblock Microsoft Outlook "Unsafe" Attachments

There are folks who send you mails disguised from persons you might know, but little do you know of the malicious content they send as attachment. In the name of security, Microsoft has started to put in place measures so that the average joe will not be able to potentially stumble on attachments that auto-execute when clicked. That is a good practice. And while that is not bad, they should also advise the end-user how to bypass such security when necessary.
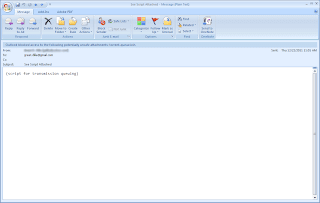
This is not the case, however. Microsoft Outlook will block registry files, executable files, javascript files, scripts and other files that are potentially hazardous. This is a blanket rule that doesn't have an exception. So whenever you get sent an attachment that fits the rule, even if you are sure it will not cause any harm it gets blocked. And you will be getting a window just like below (from Microsoft Outlook 2007).

Unblock Microsoft Outlook Attachments

Error message will look like below (filename may differ):
Outlook blocked access to the following potentially unsafe attachments: attachment_filename.exe

How then do you access the attachment when you are sure of the sender and the attachment is confirmed to be safe? This is another classic scenario of functionality versus security. Follow the procedure below to be able to access the blocked attachment.

If Microsoft Outlook is open, close it. Then open the registry editor and browse to the below registry branch.

Locate the following key(s) depending on the version of Microsoft Outlook you have:
* Outlook 2000 [HKEY_CURRENT_USER\Software\Microsoft\Office\9.0\Outlook\Security]
* Outlook 2002 [HKEY_CURRENT_USER\Software\Microsoft\Office\10.0\Outlook\Security]
* Outlook 2003 [HKEY_CURRENT_USER\Software\Microsoft\Office\11.0\Outlook\Security]
* Outlook 2007 [HKEY_CURRENT_USER\Software\Microsoft\Office\12.0\Outlook\Security]
* Outlook 2010 [HKEY_CURRENT_USER\Software\Microsoft\Office\14.0\Outlook\Security]

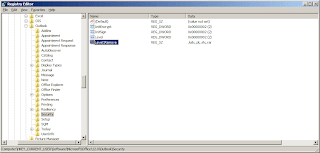
Look for the key "Level1Remove". If it does not exist create it as a string data type. Separate each file extension entry with semi-colons. Make sure to follow the syntax as this is case sensitive. As I use my email to archive scripts, I usually send a mail to myself with the script attached. So this is how it looks on my registry (see below).

Unblock Microsoft Outlook Attachments

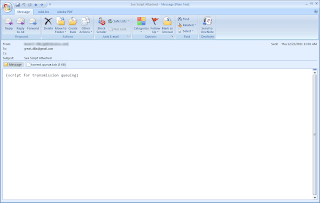
After making the necessary changes above, launch Microsoft Outlook and re-open the email with the attachment(s) and you can now access the attachment.

Unblock Microsoft Outlook Attachments

There you go folks.. Another tweak to access blocked attachments. As a security measure especially on shared computers, once you add this and access the required attachment remove the registry entry Level1Remove. Just add it when you require access to blocked attachments in the future.

Share:

TIP: Backup Wireless Network Settings (Windows 7)

One of the many advantages of Windows 7 over its predecessors is the wide array of options in backing up the system. Already inherent in its line-up of tools is the capability to create its own repair disc. But the most overlooked capability, which I think is just as useful, is the capacity to backup wireless settings.

This feature can be beneficial to you in two ways -- a backup of the configuration and a way to share wireless network configuration to another computer. Since it can backup the wireless network security key, it also serves as a way to recall the that key.

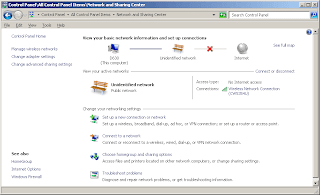
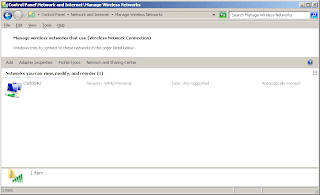
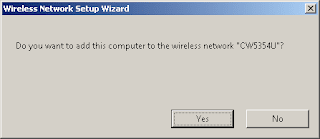
In order to create a backup of the wireless settings, go to Start --> Control Panel --> Network and Sharing Center (if using the view by icons). If your Control Panel is displayed in Category view, choose Network and Internet --> Network and Sharing Center. A similar window like below is displayed.

Backup Wireless Network Settings Windows 7

Click on Manage wireless networks (on the top left column).

Backup Wireless Network Settings Windows 7

You will be shown a list of wireless network infrastructures or ad-hoc networks that your computer can connect to. Double-click the wireless network you wish to backup.

Backup Wireless Network Settings Windows 7

Next, click on "Copy this network profile to a USB flash drive".The backup process requires a USB flash drive (UFD) to write the configuration files to. If your computer doesn't have one, you may plug one in. Then, click "Next".

Backup Wireless Network Settings Windows 7

A few files will now be written on the UFD. The files "AUTORUN.INF" and "setupSNK.exe" are now present on the UFD, together with the directory "SMRTNTKY". These files contain the backup of the wireless network settings of the computer system.

You may choose to plug the UFD on another computer and run the executable "setupSNK.exe" to configure that computer to use the same wireless network settings as the original computer. This way you have imported the wireless network settings to another computer without having to do much work.

Backup Wireless Network Settings Windows 7

Since the UFD already contains a copy of the wireless network settings, it is a backup that you can secure in a safe place. You might be needing it one way or another in the future.

Share:

REVIEW: ARCTIC Z1 Desk Mount Monitor Arm

Cable clutter is a problem with the modern computer system. Everything that is wired into the system will contribute to the clutter -- be it network cables, monitor cables, power cable, mouse and keyboard, printer, scanner and everything else that gets hooked up to the computer. A very good way to minimize this is to organize them into sleeves but the downside is disconnecting one device will take up a lot of work. The other problem that complicates this is real estate. Too much equipment can both require and take up a lot of space.

Another clever way to organize is to put money and effort in it. Design a good system right from the start and do it right the first time. A very good example to this is the compudesk project which solves a lot of those headaches.

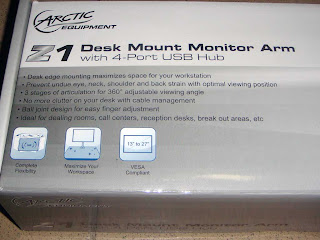
A simple method to work around the real estate problem is to deploy the appropriate space saving solution(s). One very simple and proven way to maximize workspace is the use of a monitor bracket or arm. And today we review the Arctic Z1 Monitor Arm. ARCTIC describes it as:
Z1 is a desk edge monitor mounting pole designed to maximize your workspace with total flexibility. The 3 stages articulation arm offers 360-degree adjustment of your monitor, thus providing ergonomic comfort at all times. This monitor arm is most welcome in the office and ideal for professionals.
-- taken from the ARCTIC Z1 product page

ARCTIC Z1 Desk Mount Monitor Arm

ARCTIC Z1 Desk Mount Monitor Arm

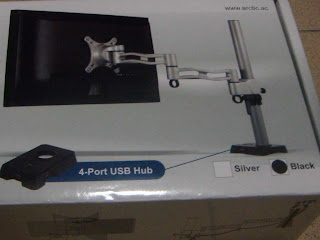
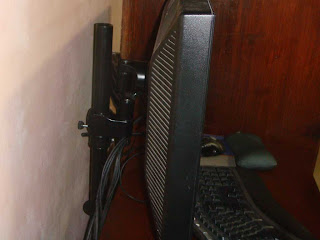
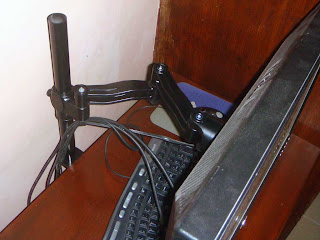
You can mount the Z1 in a variety of ways. Its pole can be clamped to the edge of the table, or bolted in place using the holes provided. Bolting it in place is more secure. In this review, I bolted the pole to the edge of my computer desk.

It is VESA compliant and could hold a wide range of monitor sizes (from 13" to the bigger 27"), thanks to its provisioned 75mm x 75mm and 100mm x 100mm holes. The bracket itself can support a monitor of up to 10kg/22lbs in weight. It is very sturdy and could hold my DELL E248WFP 24" Widescreen LCD monitor (which is about 15lbs) without problems.

ARCTIC Z1 Desk Mount Monitor Arm

ARCTIC Z1 Desk Mount Monitor Arm

The black color that ARCTIC sent made the bracket very conspicuous. It's like the flat screen is floating without support. And, since I also have an ergonomic keyboard I now have a wide workspace to put it in.

Since I have always had problems with cable clutter, I didn't install the additional USB ports that came with the package. But if you require a USB port that is readily reachable, the Z1 comes with a 4-port USB hub that is installed on the base of the pole.

The Z1 recovered my workspace, maximizing it, and giving me a lot of real estate to play with on my desktop. With the cable loops on the bracket itself, cable management is added helping solve cable clutter especially if moving or swivelling the monitor from time to time.

To those who want to maximize workspace and at the same time solve cable clutter the ARCTIC Z1 Desk Mount Monitor Arm is a recommended solution. If you have got two monitors, the Z2 will fit the bill. Like me, I need a Z2 to mount the other E248WFP.

Our gratitude to ARCTIC for sending a Z1 Monitor Arm for review. The ARCTIC Z1 will definitely pimp your rig!

Share:

TWEAK: Enable Concurrent Desktop Connections (Windows 7 SP1)

Concurrent desktop sessions or connections are only available with Server versions of Windows. On desktops, opening Remote Desktop session kicks the current user off the console session. That behavior is not desired but with today's powerful desktops, your Windows 7 machine can cater to multiple remote desktop connections or some call this concurrent desktop sessions.

Please note that doing this voids your Windows 7 license and it could render your desktop unusable. Make sure to have a backup of your desktop before trying the procedure yourself. Like always, I strongly advise that you read through the procedure thoroughly before trying things out.

Before making this post, I have made sure that it works. I use it on my home desktop running Windows 7 x64 Ultimate.

Here goes.

Download the files required from the MissingRemote page. The procedure I followed is also found in this page. In order to download the files, registration is required. Likewise, you can also google for "W7-SP1-RTM-RDP-v4", and you will find the files required.

Extract the files and open a command prompt (as Administrator) on the path where the files are extracted. You will know that the command prompt is running "as Administrator" if you find the word "Administrator" on the title block of the command window that opens. Or you may right-click on the executable script "install.cmd" on the extract path and run it "as Administrator". You will see a similar window as below.

Enable Concurrent Desktop Connections (Windows 7 SP1)

With whatchanged.exe, I monitored the changes made to my desktop in order to be able to revert it back in the future. Whatchanged.exe logged significant changes in the registry (as you can see from the screenshot above). You may find those on the directory where whatchanged.exe is located.

Once this is done, you can now connect via Remote Desktop to the tweaked desktop and the console session will not be kicked off. This can be further tweaked by allowing concurrent sessions of the same user without passwords. This is useful since on most desktops are configured for automatic login and most users don't use a password with their associated usernames.

You will have to open a registry editor and browse to the registry key HKLM\SYSTEM\CurrentControlSet\Control\Lsa. Look for the dword "LimitBlankPasswordUse" and change the value to "0" (it is set by the install.cmd script to 1).

Likewise for concurrent sessions of the same user, open registry key HKLM\SYSTEM\CurrentControlSet\Control\Terminal Server. Look for the dword "fSingleSessionPerUser" and change the value to "0" (the value set by the install.cmd script is 1).

Now you can execute a remote desktop connection to the tweaked desktop without password on your passwordless account.

Share:

FAQ: Error Resizing a Logical Volume in AIX

"There’s No Such Thing As A Silly Question" -- does the cliche sound familiar? In this part of pimp-my-rig reloaded, technical questions are answered. Mail them to me and I will post the answers here. If you have a better answer, by all means share it with us.

The beauty of a volume manager is that the backing device, or meta device as what other operating systems would call it, is made independent from the operating system. The storage device itself is controlled by another layer that is put in place by the volume manager. Thereby, the operating system does not have direct control over this storage. This way the volume group and its underlying logical volumes can be resized on demand.

Several operating systems implement this kind of obscurity including but not limited to Linux and Unix. Today we take a look at this functionality in AIX. However, resizing volumes sometimes has its own set of headaches and we need to be prepared to get around the configuration and the issues encountered each time.

Q. A colleague was trying to resize a logical volume since the application has demanded increased disk space and more breathing room. However, what he thought was a simple change to execute resulted in an error. And thus opened additional learning opportunities for us both. The change and its error was below:

root@host:/root => chfs -a size=+24G /dev/appdata01lv
0516-787 extendlv: Maximum allocation for logical volume appdata01lv
        is 3804.
root@host:/root => lslv appdata01lv
LOGICAL VOLUME:     appdata01lv            VOLUME GROUP:   appvg
LV IDENTIFIER:      00c175f4004c00635401257a0b3fe3.9 PERMISSION:     read/write
VG STATE:           active/complete        LV STATE:       opened/syncd
TYPE:               jfs2                   WRITE VERIFY:   off
MAX LPs:            3804                   PP SIZE:        32 megabyte(s)
COPIES:             1                      SCHED POLICY:   parallel
LPs:                3804                   PPs:            3804
STALE PPs:          0                      BB POLICY:      relocatable
INTER-POLICY:       maximum                RELOCATABLE:    yes
INTRA-POLICY:       middle                 UPPER BOUND:    1024
MOUNT POINT:        /mount/point/info      LABEL:          /label/has/been/hidden
MIRROR WRITE CONSISTENCY: on/ACTIVE
EACH LP COPY ON A SEPARATE PV ?: yes
Serialize IO ?:     NO
DEVICESUBTYPE : DS_LVZ
COPY 1 MIRROR POOL: None
COPY 2 MIRROR POOL: None
COPY 3 MIRROR POOL: None

A. This change can be done online without losing data nor incurring any downtime. And that is the beauty of a volume manager.

As seen from the output of the commands above, he was trying to add 24GB of space to an existing volume "appdatal01lv" but the logical volume itself seems to deny the adding of additional space to it saying that the "Maximum allocation for logical volume appdata01lv" has been hit.

He got a bit stuck here for a bit, while I was reviewing my notes from changes that I executed before. I knew I had hit this roadblock before.

From a previous change I implemented, I modified the property "MAX LPs" for the target logical volume before adding space to that volume. That step, though sometimes no longer necessary, was missing in his procedure and this time it is not optional.

We implemented the additional step to his procedure and it executed with success.

root@host:/root => chlv -x 7500 appdata01lv
root@host:/root => chfs -a size=+24G /dev/appdata01lv
Filesystem size changed to 299630592
root@host:/root => lslv appdata01lv
LOGICAL VOLUME:     appdata01lv            VOLUME GROUP:   appvg
LV IDENTIFIER:      00c175f4004c00635401257a0b3fe3.9 PERMISSION:     read/write
VG STATE:           active/complete        LV STATE:       opened/syncd
TYPE:               jfs2                   WRITE VERIFY:   off
MAX LPs:            7500                   PP SIZE:        32 megabyte(s)
COPIES:             1                      SCHED POLICY:   parallel
LPs:                4572                   PPs:            4572
STALE PPs:          0                      BB POLICY:      relocatable
INTER-POLICY:       maximum                RELOCATABLE:    yes
INTRA-POLICY:       middle                 UPPER BOUND:    1024
MOUNT POINT:        /mount/point/info      LABEL:          /label/has/been/hidden
MIRROR WRITE CONSISTENCY: on/ACTIVE
EACH LP COPY ON A SEPARATE PV ?: yes
Serialize IO ?:     NO
DEVICESUBTYPE : DS_LVZ
COPY 1 MIRROR POOL: None
COPY 2 MIRROR POOL: None
COPY 3 MIRROR POOL: None

To change the "MAX LPs" property, chfs -x NEW_VALUE has to be executed to the logical volume.

For this particular error message, the solution is to modify "MAX LPs" to cater to the additional storage requirement. You can check the current allocation from the value of "LPs" just another line below "MAX LPs". The change should not make the value of LPs go over its set MAX.

If you have changes involving increase in disk space using the AIX volume manager, better check for the value of "MAX LPs" before executing the change. Or you can note the additional step above so when implementation time comes, it will proceed without further delays.

Share:

TWEAK: Streaming Video on PCH-C200 via MediaTomb

Now that you have your Popcorn Hour C-200 (PCH-C200) setup to automatically download movies via CouchPotato and download TV shows via SickBeard, all that it takes is to wait for the movie or TV show to become available on the jukebox. If you set-up notifications, then simply wait for the notification to arrive.

However, if you have different TV sets but only one C-200 jukebox, that presents a bit of a problem doesn't it? A very simple solution to this problem is to move the C-200 jukebox to the TV you want to watch at. Still, this solution is a bit cumbersome and will not work if two persons want to watch different content at the same time.

I'd assume that since you have CouchPotato and SickBeard working, you have a home network setup. You can use the same network to stream video from your C-200. You can use a DLNA server to stream digital content (video, movies and mp3) from your C-200 jukebox. To know more about DLNA (or Digital Living Network Alliance), here is what wikipedia has to say about it:

The Digital Living Network Alliance (DLNA) is a non-profit collaborative trade organization established by Sony in June 2003, and has more than 250 member companies in the mobile, consumer electronics, PC, and service provider industries. Alliance members have stated the common goal of using standards-based technology to make it easier for consumers to use, share and enjoy their digital photos, music and videos. As of January 2011, over 9,000 different devices have obtained "DLNA Certified" status, indicated by a logo on their packaging and confirming their interoperability with other devices. It is estimated that more than 440 million DLNA-certified devices, from digital cameras to games consoles and TVs, have been installed in users' homes.
-- taken from Wikipedia: DLNA

This can be done several ways and there are several software available to accomplish this. This article concentrates on MediaTomb. First of all download MediaTomb from its sourceforge download page. Consult the readme.txt file in the tar.gz file for dependencies.

I use the "local" package from the CSI interface to satisfy dependencies. The avilable mediatomb package (v0.12.1) from "local" doesn't work for me. But the older static version from sourceforge (v0.11) works. There is also another pre-compiled mediatomb v0.11 from the NMT repository. All v0.11 packages work on the C-200 jukebox.

The easier way is to download the mediatomb packaged binaries from the NMT repository. You can install this via the Community Software Installer (or CSI) using the "Install from Zip File" option.
Mediatomb will automatically start upon installation via CSI. It will also generate its default database and config file. Mediatomb needs to be stopped as the default config will not make it function properly. You will find the installation under /share/Apps/Mediatomb and the corresponding config file is /share/Apps/Mediatomb/.mediatomb/config.xml.

You will need to add the following lines to the config.xml file under tag <import>:

<magic-file>/share/Apps/Mediatomb/usr/share/file/magic</magic-file>
<filesystem-charset>ISO-8859-1</filesystem-charset>
<metadata-charset>ISO-8859-1</metadata-charset>

For better performance, look for the code <virtual-layout> and set the value to "disabled" (default is "builtin"). This is optional, but I find better performance out of this tweak.

After making the above changes, start mediatomb (using mediatomb.sh start). Then launch a browser and point to http://C200-IP:49152/ (replace C200-IP with the IP address of your C-200 jukebox). The default username and password to access the browser interface is mediatomb and mediatomb. You can change those defaults inside the config.xml file.

Browse the filesystem tree and add the paths that need to be added, scanned and/or monitored as media is added. Add to this configuration the paths of destination files for both SickBeard and CouchPotato. You can monitor errors via the log file. For my case I set Timed, Full, Recursive and every 14400 seconds on the directories/paths that I add for scanning/monitoring.

Streaming Video on Popcorn Hour C-200 (PCH-C200) via MediaTomb

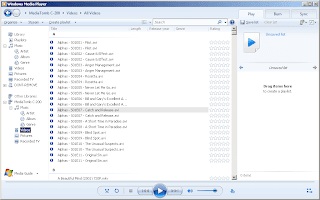
The glitch I found on MediaTomb is that it displays duplicate entries of files on Windows Media Player 12 library. You can see this better illustrated by the screenshot below. As you can see, each episode of the TV show "Alphas" is listed twice.

Streaming Video on Popcorn Hour C-200 (PCH-C200) via MediaTomb

Aside from that, the icons displayed seem to be generic and not video specific. I don't find these glitches very significant as long as the functionality I want is there. This duplicate entry issue is not present when viewing media listings on the LG and Samsung DLNA-enabled TV. Seems to manifest only with Windows Media Player 12. On Windows notebooks, I tested the streaming functionality on Windows Media Player 12 library and VLC v1.1.19, using the Advanced Open option to open media files.

Share:

HOW-TO: Install CouchPotato on Popcorn Hour C-200 (PCH-C200)

From the previous article that discussed how to Install SickBeard on the Popcorn Hour C-200, we learned how to automate the search and download of our favorite TV shows. If there is SickBeard for TV shows, there must be another for Movies. You are right on the money and CouchPotato is the equivalent PVR for movies.

"CouchPotato is an automatic NZB and torrent downloader. You can keep a "movies I want"-list and it will search for NZBs/torrents of these movies every X hours. Once a movie is found, it will send it to SABnzbd or download the .nzb or .torrent to a specified directory." -- taken from the CouchPotato website.

Install. CouchPotato works well with the Popcorn Hour C-200 just like SickBeard. And, like SickBeard, CouchPotato needs the Community Software Installer (or CSI). Under the Applications tab, select couchpotato and install it to the C-200.

In case you haven't done so, both CouchPotato and SickBeard require the "local" package installed to be able to run. The "local" package is installed via CSI as well.

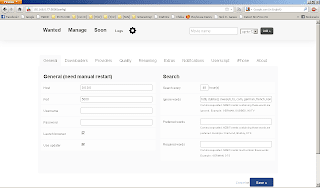
Configure. Access the web page of CouchPotato to be able to get to the configuration page. Launch your favorite browser, point to "http://C200-IP:5000/movie" (replace C200-IP with the IP address of your PCH-C200) and CouchPotato configuration is done by clicking on the gear icon (to the right of "Logs").

Under the "General" tab, nothing much to configure here. But perhaps if you wish to ignore NZBs (or torrents) with keywords in them, you might want to configure under "Ignore words". Think of this field as a blacklist of keywords. Or if you wish to make "Director's Cut" take precedence over other NZBs (or torrents), the same configuration can be put under the "Preferred" or "Required" words.

Install CouchPotato on Popcorn Hour C-200

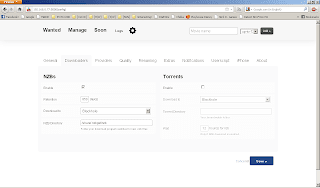
The "Downloaders" tab will make you select between NZBs, torrents or both. I use blackhole directory for either NZB or torrent in my configuration. For TV shows, it is easier to configure with NZBs but large high definition movies are not very much available unless subscribed to a Usenet search provider. So torrents seem to be favorable here.

Install CouchPotato on Popcorn Hour C-200

On the "Providers" page you can configure CouchPotato with the Usenet index service provider to use. It is clear that this is for NZBs. And most of the usenet search providers for CouchPotato require subscription. Given that, this favors the use of torrents. If you are using torrents, thepiratebay.org is the default search service provider. No further configuration is necessary for torrents.

Install CouchPotato on Popcorn Hour C-200

For full automation, the "Renaming" tab can be set to configure the naming convention and also the "blackhole" and target directory where the movies will be stored. Here, be careful with the "Cleanup" option. When ticked, CouchPotato will automatically remove the unnecessary files downloaded with the video file. When you have reviewed the logs and verified CouchPotato works to your liking, you can tick this option.

Install CouchPotato on Popcorn Hour C-200

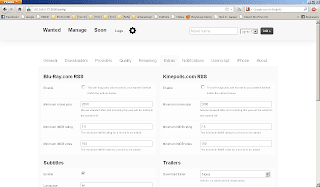
Extras enables or disables the automatic downloading of subtitles and trailers for the movies downloaded and processed by CouchPotato.

Install CouchPotato on Popcorn Hour C-200

Add Movies. After configuration, you can start adding movies for CouchPotato to search, download and post-process. So with SickBeard and CouchPotato, more functionality are added to your Popcorn Hour C-200 Network Media Jukebox. Visit us again soon as I will outline several steps to transform your NMJ to serve as a DLNA server.

Share:

HOW-TO: Install SickBeard on Popcorn Hour C-200 (PCH-C200)

"I know what I have, but I'm not sure what it is capable of." This cliche sounds familiar isn't it? I belong to this category, and it is highly probable that many others share the same fate. Thanks to the internet and the many forums and blogs that information is freely available to those who want to know more about their gadgets and what they are capable of.

If you have a Popcorn Hour C-200 (PCH-C200), there is more to the device than its intended purpose of being a Networked Media Jukebox (NMJ). There's more to the device than playing multimedia content -- it can download those too!

Sick Beard is a PVR for newsgroup users (with limited torrent support). It watches for new episodes of your favorite shows and when they are posted it downloads them, sorts and renames them, and optionally generates metadata for them. It currently supports NZBs.org, NZBMatrix, NZBs'R'Us, Newzbin, Womble's Index, NZB.su, TVTorrents and EZRSS and retrieves show information from theTVDB.com and TVRage.com. --taken from the official webpage of SickBeard

Install. You would be interested to know that this software can automate the downloads of your favorite TV Shows. And this is done automatically without you having to do anything. All that it takes is to properly configure SickBeard, add your favorite shows, and watch your favorite TV shows on the C-200.

For this install, you will be needing the Community Software Installer (or CSI). Under the Applications tab, select sickbeard and install it to the C-200. It is that simple.

Configure. Now that sickbeard is installed, configuration has to be done. It is important that you point sickbeard to the right directories -- the directory where it will monitor the downloaded TV files and, (optional) if you are using the blackhole method, point it to the blackhole directories of NZBget (usenet) or transmission (torrent).

Launch your favorite browser and point to "http://C200-IP:8081/home" (replace C200-IP with the IP address of your PCH-C200) and click on "Config". You can have several options here. The "General" tab is straight forward.

Under "Search Settings", I ticked "Download propers". And from here, I also choose "NZB Search" using the blackhole method. You can also set sickbeard to download via torrent and put the blackhole directory of the transmission client.

Install SickBeard on Popcorn Hour C-200

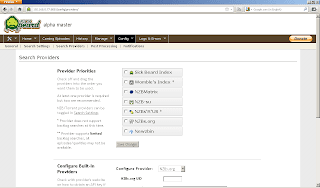
Next, configure the providers. Tick the providers that you want to utilize. You may change the order of the providers via drag-and-drop. Since I'm not really into backlogs, the "Sick Beard Index" and "Wombie's Index" are sufficient. Most of the other providers need subscription but if you have active subscriptions you may put the API keys in the appropriate forms on this page.

Install SickBeard on Popcorn Hour C-200

Post processing is also important if you want to automate the renaming of your favorite TV shows. This part of the automation process is needed if you want to add episode titles. You may also configure how the renaming would appear, including the separators and season folders. A word of caution in this part of the configuration, tick the box corresponding to "Keep Original Files", until you are really sure that SickBeard works or once SickBeard functionality has been tested.

Once "Keep Original Files" is unticked, post processing of downloaded files will delete or clean-up all of the other downloaded files and will retain only the .avi or .mkv file. This box comes ticked by default, so no need to worry.

The directory named in this part of the configuration is the directory where transmission or nzbget will download the files to. This is not the directory where your TV shows will be stored permanently. Think of it as a bucket where you will temporarily store the downloads -- sort of the "blackhole" folder of SickBeard.

Install SickBeard on Popcorn Hour C-200

With all the configuration done, it is time to add shows for SickBeard to download. Under the "Home" tab, is where you can "Add Shows". When adding shows, you are also asked where the episodes will be stored. Give this the path to folder where you want the episodes to be stored after post-processing. This should be a different directory than the "blackhole" folder above.

The addition will trigger SickBeard to search if any of the providers have indexed the added show, and you can see if SickBeard has downloaded the appropriate file (nzb or torrent) to the appropriate download client.

Also, you can view SickBeard logs from the web interface or on the C-200 itself. And aside from that, you can check if the TV show is scheduled to be aired soon.

Further tweaks can be done on the SickBeard installed on the C-200. Check out the "Notifications" tab under the "Config" menu and configure the notification options.

SickBeard takes care of the TV shows, but for Movies the equivalent software is CouchPotato. And the installation of CouchPotato is what we will outline next.

Share:

HOW-TO: Disabling Built-in Flash Player in Google Chrome

One of the biggest reasons I use Google's Chrome browser is the innate capability to translate content that is posted in a foreign language. This comes built into the browser itself and you don't have to do anything after installation. No other browser has this capability, to date.

Another reason, is Google Chrome is more secure than other browsers with its sandbox environment and what nots. Although this is subject to debate, I find this acceptable as it is and with that in mind, I use Chrome most of the time. There are still other functionality I find Mozilla's Firefox is better at, especially now that version 7 has better memory management.

While all these built-in functionality is great, there are exceptions to the rule. What am I pointing to? It is the Flash Player that is built-into Google Chrome. Did you know that Flash Player updates are included in Chrome system updates? Believe it.

That may not be a bad thing in itself, you may want to have control over how your browser behaves. And since you probably don't let Chrome monopolize your browsing behavior and we don't know which Flash Player takes priority and precedence, we can disable the built-in Flash Player and let the installed Flash Player take over.

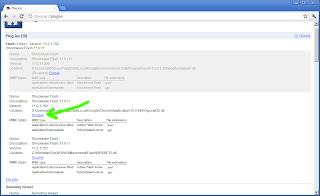
Launch Google Chrome and type "about:plugins" (or "chrome://plugins") to the address bar. On the upper right you can click on the "plus" sign next to Details. This opens the plug-ins installed on the browser.

On my Chrome, I have 3 versions of Flash Player installed. And below is the screenshot of that.

Disabling Built-in Flash Player in Google Chrome

You can also see the versions of Flash Player plug-ins installed on the browser. And from the screenshot below you can see those information. From here, you can enable or disable the Flash Player plug-ins.

Disabling Built-in Flash Player in Google Chrome

I tend to think that the order in which the Flash Player plug-ins appear also indicates precedence but this is not confirmed. It is just a hunch. So there you go folks, disabling the built-in Flash Player in Google Chrome.

Share:

TIP: Dexpot Utility for Virtual Desktops

As a system administrator, I need a lot of real estate on my desktop to be able to do multitasking and accomplish things in parallel. In the *nix environment this doesn't cause issues as there are virtual desktops readily available. This is true regardless of whether you are on the command-line or the graphical user interface (GUI). Even on the text-mode interface, Linux has virtual terminals still making it possible to do multiple tasks at once.

However, most sysads nowadays use Windows and just open terminal connections to the remote server. There are no virtual desktops on the Windows environment. And often, given the mobility preference, screen size is limited. This is where virtual desktops play a big factor.

Where this functionality is absent, dexpot comes to fill the gap. You can have up to 20 multiple virtual desktops, if you require that many. This is an easy way of increasing work area without having to shell out. What's more, switching to another desktop is easy as this functionality is supplied via hotkey.

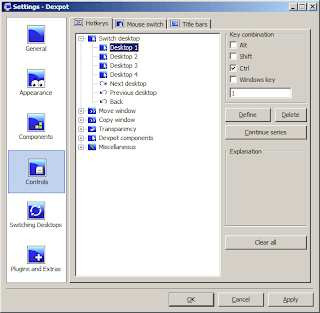
For ease-of-use, this is how I configure dexpot. For hotkeys, I assign [CTRL]+[1] ... [CTRL]+[4] for desktop switching. You can customize the same for your own taste.

Dexpot Utility for Virtual Desktops

Then I also let the Desktop Manager run with dexpot. I place the icons near the system tray so that I could either use hotkeys to switch desktops or click on the Desktop Manager icons. Below is how it looks.

Dexpot Utility for Virtual Desktops

For some reason, the developers assigned German as the default language of dexpot. It is quite difficult to change the language settings on the application interface if you don't understand German. The fastest way to get around this configuration is to explore the directory sprache (under the dexpot directory). In this directory you will find language files. Delete everything except english.dxs (or move them to another folder if you wish). This will make dexpot run in English and is the easiest way to get this configuration done with less effort.

Even with a small screen on my Dell Latitude D630 notebook, dexpot has given me a lot of real estate with the virtual desktop functionality. You might find this useful too.

Share:

INFO: What is a "Sticky Bit"?

At a recent job interview, I was asked this question. I was able to satisfactorily answer the question but failed to answer the follow-up question -- what is the difference between the sticky bit "t" (small letter) and the sticky bit "T" (bold letter)? This experience led me to improve my knowledge further. This post is dedicated to the experience I had, and to share the knowledge to those who quest for it.

What is the "Sticky Bit"? ("t" and "T"). The sticky bit is primarily used on shared directories with open permissions, such as /var/tmp and /tmp. Directories with open permissions (or publicly writable) present a lot of problems because users **CAN CREATE** files, **READ/EXECUTE** files owned by other users, and at the same time are **ALLOWED EDIT/REMOVE** privileges to files owned by other users.

With sticky bit set on publicly writable directories, users **CAN CREATE** files, **READ/EXECUTE** those files as well as files owned by other users, but are **NOT ALLOWED EDIT/REMOVE** privileges to files they don't own. The only exception to this is the super-user root which can edit or remove files.

In simple terms, sticky bit is used to indicate special treatment of certain directories. A directory for which the sticky bit is set restricts deletion or modification of files it contains. A file in a sticky bit set directory may only be removed, modified or renamed by a user who has write permission on the directory, and either owns the file, owns the directory, or is the super-user. This is useful for directories such as /tmp, which must be publicly writable, but should deny users permission to arbitrarily delete or rename the files of others.

It is worthy to note here that the directories with open permissions (or publicly writable) can be any arbitrary directory, not just limited to /tmp and /var/tmp. Its just that /tmp and /var/tmp exist by default on the system.

Which directory has sticky permissions? How do you identify a directory that has sticky bit set? To illustrate further see the example below.

user@host# ls -ld /sticky/directory
drwxrwxrwt  2   user   group   512   Jun 20 11:02  /sticky/directory

On the output of the "ls" command, see the "t" (on drwxrwxrwt)? That tells us that the sticky bit is set.
A "T" refers to when the execute permissions are OFF.
A "t" refers to when the execute permissions are ON.

How to set sticky bit permissions. The leading "1" in the "chmod" command sets the sticky bit.
user@host# chmod 1777 /sticky/directory (permissions for "other" have execute bit ON) 
drwxrwxrwt
user@host# chmod 1776 /sticky/directory (permissions for "other" have execute bit OFF)
drwxrwxrwT

The equivalent of the above commands in another syntax.
user@host# chmod o+t /sticky/directory
user@host# chmod o+x /sticky/directory
drwxrwxrwt        
user@host# chmod o+t /sticky/directory
user@host# chmod o-x /sticky/directory
drwxrwxrwT
Or..
user@host# chmod o=rwxt /sticky/directory
drwxrwxrwt        
user@host# chmod o=rwt /sticky/directory
drwxrwxrwT

There you go, more information regarding sticky bit. To my knowledge, sticky bit for files are not supported by any modern implementation of Unix or Linux. It is only significant and applicable to directories.

Share:

FAQ: Mouse Randomly Freezing on Windows 7

"There’s No Such Thing As A Silly Question" -- does the cliche sound familiar? In this part of pimp-my-rig reloaded, technical questions are answered. Mail them to me and I will post the answers here. If you have a better answer, by all means share it with us.

Q. I recently encountered something that was both weird and quite disappointing -- my mouse started freezing randomly and it did so at times when it mattered the most. This can be annoying at times. Searching for solutions on the internet was a bit futile and I also learned that a lot of people have been complaining about this problem for years now. Their petitions to Microsoft seem to have fallen on deaf ears.

A. The only other alternative was to use a PS/2 mouse, which I don't have. I remember having a USB to PS/2 converter packaged with my Logitech MX518 Optical Mouse but since I bought it years ago I can't recall where that adapter is now.

I have to make this mouse work without having to resort to buying another one. I know it works since I tested in on my notebook (running on XP) and it doesn't exhibit the same random freezing.

A friend recently gave me this tip for me to try out. It involves making changes to the registry. Before proceeding heed this warning. WARNING: Changes to the registry can render your system unusable. Be warned that changes to the registry can be harmful to your system. But when done right, you can fix the random freezing of your mouse.

Now that you have been warned, open the registry editor Start -> Run.. -> regedit. Browse over to HKEY_LOCAL_MACHINE\SYSTEM\CurrentControlSet\Enum\HID. Under this branch of the registry you will see keys starting with VID, which we can't comprehend.

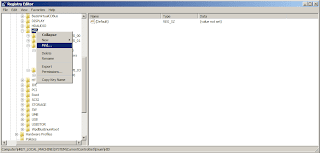
To make life easier, right click on HID and select Find. You will see a similar window as the screenshot below.

Mouse Randomly Freezing on Windows 7

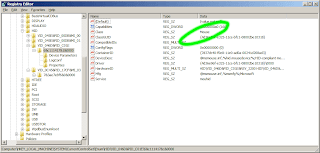
Look for the entry "Mouse". You will find it under VID branch having a key that starts with "6&XXXXX" (see below). This string might be different on your machine. This screenshot is for my Logitech MX518 Optical Mouse. If you have the same mouse, the key could be the same -- 6&c111417&1&0000.

Mouse Randomly Freezing on Windows 7

Under the 6&XXXXX branch is another key "Device Parameters". Under this key add as DWORD "HScrollHighResolutionDisable" and give it a value of "1". Add another DWORD "VScrollHighResolutionDisable" and similarly give it a value of "1".

Mouse Randomly Freezing on Windows 7

Close the registry editor and reboot. Then check if this solves the random freezing of your USB mouse. You may consider looking for other values of "Mouse" on the HID registry key and repeat the process. On my desktop, the "Mouse" entry appeared only once. For a week now, my mouse has been freeze-free.

Share:

REVIEW: Arctic Cooling Freezer PRO13 CO

I recently received a brown box which courier FedEx brought. I opened it and a brand new heatsink Arctic Cooling Freezer PRO13 CO was inside the box for review.

Here is a brief rundown of the specifications of the Arctic Cooling Freezer PRO13 CO:
Heatsink Material : Aluminum fins x 47
Thickness of fins : 0.5 mm
No. of Heatpipes : 4
Fan (mm): 120mm x 1
           50mm x 1
Rated Fan Speed : 120mm: 300 - 1350 RPM
                  50mm: 700 - 2700 RPM
Airflow : 49.7 CFM / 96.8 m³/h
Cooling Capacity (Watts) : 300
Noise Level (Sone) : 0.4
Bearing : Dual Ball Bearing
Dimensions (Product) : 134L x 96W x 159H mm
Dimensions (Packaging) : 137L x 99W x 173H mm
Limited Warranty : 6 years
Product Net Weight : 0.893 kg
Gross Weight : 1.6 kg

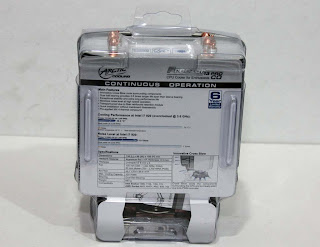
A big change to the heatsink packaging is notable. What used to be black boxes bearing the Arctic Cooling logo was the usual packaging. For Freezer PRO13 CO, it is now a clear blister pack that displays the heatsink and fan (HSF).

Arctic Cooling Freezer PRO13 CO

Arctic Cooling Freezer PRO13 CO

Opening the package is quite easy. It is packed with mounting brackets, push pins and mounting screws. It also includes the instruction manual.

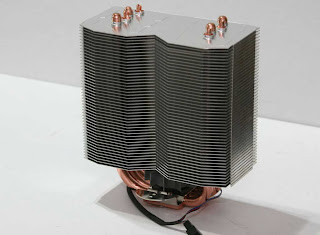
Below is a close-up of the HSF with its 9-blade 1350RPM fan. 120mm fans offer big airflow without the painful sound piercing your ears. At 1350rpm, that is what you'll expect on the Freezer PRO13 CO.

Arctic Cooling Freezer PRO13 CO

Aside from the 120mm fan, the Freezer PRO13 CO also comes with a 50mm radial fan on the bottom of the heatsink. This patented "Cross Blow" technology at the base of the cooler also cools the surrounding areas of the heatsink.

Arctic Cooling Freezer PRO13 CO

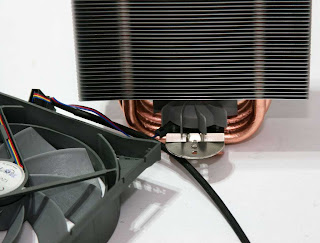
We removed the fans to take a closer look at the heatsink. Below you can see the heatsink and its base.

Arctic Cooling Freezer PRO13 CO

Arctic Cooling Freezer PRO13 CO

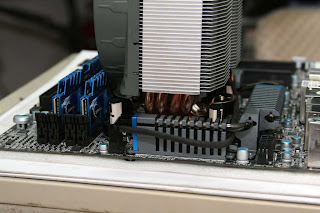
A heatsink this heavy (893g) should come with a backplane and stronger mounting brackets. However, the push pins hold the Freezer PRO13 CO without problems. It also doesn't give any mounting problems with surrounding components, like tall memory modules or the video card. The Gigabyte X58XP-UD5 has a tight fit on the CPU and memory area but the Freezer PRO13 CO fits without problems.

Arctic Cooling Freezer PRO13 CO

In the end, everything is all about the heatsink performance and here is how it fared.

Arctic Cooling Freezer PRO13 CO

Compared to the stock intel heatsink, the Freezer PRO13 CO is 6°C cooler at idle. This gap widens to 11°C at load. What I'd like to see is an option to switch the fan to a bit more than 1350 rpm especially for overclocking purposes. But with this performance, the Freezer PRO13 CO will not disappoint. If silence is your preference this is the heatsink for you.

Appreciation goes to Arctic Cooling for sending us a sample for review. Also, to my good friend Xavier Zulueta for reviewing the Arctic Cooling Freezer PRO13 CO.

Share:

HOW-TO: Tabbed Putty with PuttyCM (Windows 7)

If you work as a system administrator and your workstation has windows (particularly Windows 7), chances are you connect to the Linux, Solaris, AIX or whatever flavor of *nix using putty. If by any chance you don't you might want to try putty, instead of the current program you're using.

I have used putty since I started working as a Unix sysad. And I can tell that putty in itself is a superb and versatile tool. But work starts getting complicated once you have several putty sessions open. And it becomes even challenging once you open more putty sessions. PuttyCM (or Putty Connection Manager) organizes putty sessions into tabs or split windows (by dragging a tab). This way, working becomes organized and much faster. You may want to download PuttyCM to try it out.

However, PuttyCM doesn't work out-of-the-box in Windows 7. So here's a pimp-my-rig feature designed to guide you in configuring PuttyCM to make it work in Windows 7. To give you a better understanding of what I mean by it doesn't work, here is the screenshot of PuttyCM connecting to my Popcorn Hour C-200 NMJ.

Tabbed Putty with PuttyCM (Windows 7)

As you can see, it doesn't work well. You are able to use the connection manager or putty sessions but it doesn't display the connection properly. And you can't do your job with PuttyCM. So it is just back to plain Putty or so it seems.

Here's how to make PuttyCM work in Windows 7.

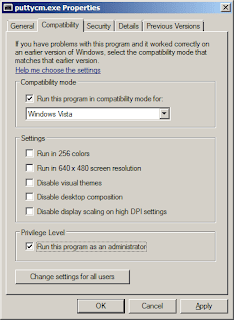
Explore to the directory containing the PuttyCM executable (its filename is: puttycm.exe). Right-click the executable file and go to Compatibility tab. Choose compatibility for Windows Vista. You may choose Vista SP1 or SP2 as these work as well. Toward the bottom of the Compatibility tab, tick "Run this program as an administrator". You will be seeing a window similar to the one below.

Tabbed Putty with PuttyCM (Windows 7)

Now try to launch PuttyCM and connect to a host.

How sweet it is to see the terminal connection display.

Tabbed Putty with PuttyCM (Windows 7)

So there you go folks, working tabbed putty with PuttyCM in Windows 7. As of this writing, PuttyCM version 0.7.1 build 136 (beta) works. And the current alpha 0.7.1 build 233 works in Windows 7 and Windows 7 SP1.

Share:

FAQ: Error Running 64bit Commands

"There’s No Such Thing As A Silly Question" -- does the cliche sound familiar? In this part of pimp-my-rig reloaded, technical questions are answered. Mail them to me and I will post the answers here. If you have a better answer, by all means share it with us.

Q. I recently encountered an error that made me scratch my head. I knew I had encountered it before and had resolved the problem. Unfortunately, my notes were not available at work due to the security policies in place. But when I got home, the putty logs that I saved from before proved really useful.

Encountering weird errors like this one really makes its mark on your memory. To give you an idea what it is, see below. Simple commands like uptime will return errors, and will not run. In fact, all 64-bit executables refuse to run and will give the same error as below.

user@host > uptime
exec(): 0509-036 Cannot load program uptime because of the following errors:
        0509-033 Cannot run a 64-bit program until the 64-bit
        environment has been configured. See the system administrator.

A. Fortunately, I enabled logging on my putty and saved them for future review. And the time for reaping the benefits of that move paid out.

This was how I resolved that problem above. The command to run is "smitty load64bit" or "smit load64bit" (should be executed as root or a privileged user). After smit loads, select "Enable Now".

Once executed, 64bit commands will now run without hitch. No need to reboot the machine.

To my curiosity, I checked the output of smit.log and below is how it looks.

user@host > cat smit.log

[Apr 28 2010, 07:31:21]
    Starting SMIT

(Menu screen selected as FastPath,
        id          = "system",
        id_seq_num  = "220",
        next_id     = "load64bit",
        title       = "Enable 64-bit Application Environment".)

(Menu screen selected,
        FastPath    = "load64bit",
        id_seq_num  = "220",
        next_id     = "load64bit",
        title       = "Enable 64-bit Application Environment".)

(Dialogue screen selected,
        FastPath    = "run64now",
        id          = "run64now",
        title       = "".)

[Apr 28 2010, 07:31:33]

    Command_to_Execute follows below:
>> /etc/methods/cfg64


    Output from Command_to_Execute follows below:

---- start ----


---- end ----

[Apr 28 2010, 07:31:37]
    Exiting SMIT


From the output of smit.log above, you can deduce that if you will not be using smit you can instead use "/etc/methods/cfg64" to accomplish the same results.

Share:

FAQ: Powermt Returns Initialization Error

"There’s No Such Thing As A Silly Question" -- does the cliche sound familiar? In this part of pimp-my-rig reloaded, technical questions are answered. Mail them to me and I will post the answers here. If you have a better answer, by all means share it with us.

Q. I was working on an AIX host when I encountered "Initialization Error." when running "powermt display". This error is present when running as sudo. But I tried running as root, hoping things would be different as super-user but that was not the case. The errors I encountered are below.
user@host > sudo powermt display
Initialization error.
user@host > su
Password:
root@host > powermt display
Initialization error.

A. This puzzled me even more. Even as the super-user "root", the error was persistent. I'm not that very well versed with AIX, so I tried using a command that was always useful in Solaris -- truss. I then hit jackpot!

This is the output of the command.

root@host > truss powermt display

execve("/usr/sbin/powermt", 0x2FF22C94, 0x2000FB38)  argc: 2
__loadx(0x03480000, 0x2FF22A70, 0x00000140, 0x10000000, 0x2000033D) = 0x00000000
__loadx(0x0C000000, 0xF020AABC, 0x00000000, 0xF0317004, 0xF020A460) = 0x00000000
thread_init(0x0000000000000000, 0x00000000D0117CCC) = 
sbrk(0x00000000)                                = 0x20018404
vmgetinfo(0x2FF22978, 7, 16)                    = 0
sbrk(0x00000000)                                = 0x20018404
vmgetinfo(0x2FF22440, 7, 16)                    = 0
sbrk(0x00000000)                                = 0x20018404
sbrk(0x0000000C)                                = 0x20018404
__libc_sbrk(0x00000000)                         = 0x20018410
getrpid(-1, -1, -265185236)                     = 253984
_getpid()                                       = 253984
getprocs(0x20018ED8, 920, 0x00000000, 0, 0xF03173B0, 1) = 1
appulimit(1005, 0)                              = 0x20029000
_thread_self()                                  = 610395
thread_setmystate(0x00000000, 0x2FF225D0)       = 0
thread_setmystate(0x2FF222C0, 0x2FF225C8)       = 0
_sigaction(3, 0x2FF228F8, 0x2FF22908)           = 0
_sigaction(4, 0x2FF228F8, 0x2FF22908)           = 0
_sigaction(5, 0x2FF228F8, 0x2FF22908)           = 0
_sigaction(6, 0x2FF228F8, 0x2FF22908)           = 0
_sigaction(7, 0x2FF228F8, 0x2FF22908)           = 0
_sigaction(8, 0x2FF228F8, 0x2FF22908)           = 0
_sigaction(10, 0x2FF228F8, 0x2FF22908)          = 0
_sigaction(11, 0x2FF228F8, 0x2FF22908)          = 0
_sigaction(12, 0x2FF228F8, 0x2FF22908)          = 0
_sigaction(36, 0x2FF228F8, 0x2FF22908)          = 0
_sigaction(39, 0x2FF228F8, 0x2FF22908)          = 0
open("/unix", O_RDONLY|O_LARGEFILE)             = 3
kioctl(3, 22528, 0x00000000, 0x00000000)        Err#25 ENOTTY
kread(3, "01F7\005 IFC aE6\0\0\0\0".., 4096)    = 4096
klseek(3, 0, 0, 0x00000001)                     = 0
klseek(3, 0, 13942134, 0x00000000)              = 0
kread(3, "\0\0\0\0\0\0 1\0\0\0\004".., 4096)    = 4096
klseek(3, 0, 0, 0x00000001)                     = 0
klseek(3, 0, 15041308, 0x00000000)              = 0
kread(3, " _ _ m u l h\0 _ _ m u l".., 4096)    = 4096
klseek(3, 0, 0, 0x00000001)                     = 0
klseek(3, 0, 13942170, 0x00000000)              = 0
kread(3, "\0\0\0\0\0\0 180\0\0\0\v".., 4096)    = 4096
klseek(3, 0, 8, 0x00000001)                     = 0
kread(3, "\0\0\0\001 XF1B8\0\0028E".., 4096)    = 4096
klseek(3, 0, 8, 0x00000001)                     = 0
kread(3, "\0\0\0\001 XF5 H\0\0\tE6".., 4096)    = 4096
klseek(3, 0, 8, 0x00000001)                     = 0
kread(3, "\0\0\0\001 XF8D8\0\0028E".., 4096)    = 4096
klseek(3, 0, 8, 0x00000001)                     = 0
kread(3, "\0\0\0\001 XFC h\0\00F12".., 4096)    = 4096
klseek(3, 0, 8, 0x00000001)                     = 0
kread(3, "\0\0\0\001 XFFF8\0\0028E".., 4096)    = 4096
klseek(3, 0, 8, 0x00000001)                     = 0
kread(3, "\0\0\0\001 Y0388\0\0149F".., 4096)    = 4096
klseek(3, 0, 8, 0x00000001)                     = 0
kread(3, "\0\0\0\001 Y0718\0\0028E".., 4096)    = 4096
klseek(3, 0, 8, 0x00000001)                     = 0
kread(3, "\0\0\0\001 Y\nA8\0\0028E".., 4096)    = 4096
klseek(3, 0, 8, 0x00000001)                     = 0
kread(3, "\0\0\0\001 Y0E 8\0\019AC".., 4096)    = 4096
klseek(3, 0, 8, 0x00000001)                     = 0
kread(3, "\0\0\0\001 Y11C8\0\01E <".., 4096)    = 4096
klseek(3, 0, 8, 0x00000001)                     = 0
kread(3, "\0\0\0\001 Y15 X\0\0 " W".., 4096)    = 4096
klseek(3, 0, 8, 0x00000001)                     = 0
kread(3, "\0\0\0\001 Y18E8\0\0 '99".., 4096)    = 4096
klseek(3, 0, 8, 0x00000001)                     = 0
..
(some output omitted for brevity..)
..
close(3)                                        = 0
open("/etc/emc/mpaa.lams", O_RDWR|O_CREAT, S_IRUSR|S_IWUSR|S_IRGRP|S_IWGRP) = 3
kfcntl(3, F_SETLKW, 0x2FF224B8)                 = 0
open("/etc/emc/mpaa.lams", O_RDONLY)            = 4
kioctl(4, 22528, 0x00000000, 0x00000000)        Err#25 ENOTTY
kread(4, " g l o b a l : v e r s i".., 4096)    = 122
kread(4, " g l o b a l : v e r s i".., 4096)    = 0
close(4)                                        = 0
kfcntl(3, F_SETLK, 0x2FF224B8)                  = 0
close(3)                                        = 0
open("/etc/emcp_registration", O_RDONLY)        = 3
kioctl(3, 22528, 0x00000000, 0x00000000)        Err#25 ENOTTY
klseek(3, 0, 0, 0x00000000)                     = 0
close(3)                                        = 0
statx("CuDv", 0x2FF21710, 76, 0)                Err#2  ENOENT
open("CuDv", O_RDONLY)                          Err#2  ENOENT
Initialization error.
kwrite(2, " I n i t i a l i z a t i".., 22)     = 22
__loadx(0x04000000, 0x2FF20A50, 0x00002000, 0x00000000, 0x00000000) = 0x00000000
kfcntl(1, F_GETFL, 0x1009505B)                  = 67110914
kfcntl(2, F_GETFL, 0x1009505B)                  = 67110914
_exit(103)
As seen from the error above, powermt was looking for the file "CuDv" which is an ODM object. So I tried a trick that I previously noted in post FAQ: Path Errors on AIX ODM Commands.
root@host > cd /etc/objrepos
root@host > powermt display
Symmetrix logical device count=138
CLARiiON logical device count=0
Hitachi logical device count=0
Invista logical device count=0
HP xp logical device count=0
Ess logical device count=0
HP HSx logical device count=0
==============================================================================
----- Host Bus Adapters ---------  ------ I/O Paths -----  ------ Stats ------
###  HW Path                       Summary   Total   Dead  IO/Sec Q-IOs Errors
==============================================================================
   0 fscsi0                        optimal     138      0       -     0      0
   1 fscsi2                        optimal     138      0       -     0      0

This was deja vu all over again. But I now know that when facing these errors, it is useful to just change directory to /etc/objrepos before executing the privileged commands.
Share:

S/W: Flash Player V10.3.183.7 Update

"Adobe® Flash® Player is a cross-platform, browser-based application runtime that provides uncompromised viewing of expressive applications, content, and videos across browsers and operating systems. Flash Player 10.3 delivers beautiful HD video, faster graphics rendering, and high performance on mobile devices and personal computers and is designed to take advantage of native device capabilities -- enabling richer, more immersive user experiences."

Flash Player has monopolized this arena of delivering high quality digital content for ages now. By far, the closest thing to a challenge to Flash Player is DivX HiQ Web Player but that is only for video playback. It remains and will remain in the limelight for the next few years.

Lately, Flash Player has penetrated the mobile arena and has full support for mobile devices especially Android.

Adobe Flash Player

Features.
  • Immersive experiences with Flash video, content and applications with full-screen mode.
  • Low-bandwidth, high-quality video with advanced compression technology.
  • High-fidelity text using the advanced text rendering engine.
  • Real-time dynamic effects with filters for Blur, DropShadow, Glow, Bevel, Gradient Glow, Gradient Bevel, Displacement Map, Convolution, and Color Matrix.
  • Innovative media compositions with 8-bit video alpha channels.
  • Blend modes, radial gradient, and stroke enhancements.
  • Additional image formats: GIF, Progressive JPEG, and PNG.

Changelog:
Addresses compatibility issues:
  • Calls to gotoAndPlay() and gotoAndStop() no longer fail in some Flash applications which load shared libraries.
  • TextField instances which specify a negative offset (x property contains a negative value) now correctly flow the text horizontally instead of vertically.
  • Improved performance in some cases when displaying complex animations.
  • MSI versions of the Flash Player Installer now properly install the Native Settings Manager control panel on Windows.
  • Flash applications at certain websites (http://www.justin.tv, http://heylenmichel.de) now load correctly.
Flash player has always been criticized by its flagrant use of resources especially on the processor. The only other downside to Flash Player is the consistent scrutiny of the security holes it features. Nevertheless, it is always a tradeoff between functionality and security.

(Logos are copyrights of their respective owners.)

Download from www.adobe.com/products/flashplayer.

Share:

S/W: Piriform CCleaner V3.10.1525 Update

"CCleaner is the number-one tool for cleaning your Windows PC. It protects your privacy online and makes your computer faster and more secure. Easy to use and a small, fast download." This statement you can see on the Piriform CCleaner website. CCleaner as it is now known used to be Crap Cleaner. The name makes sense as it cleans crap out of your computer.
Features. CCleaner is our system optimization, privacy and cleaning tool. It removes unused files from your system - allowing Windows to run faster and freeing up valuable hard disk space. It also cleans traces of your online activities such as your Internet history. Additionally it contains a fully featured registry cleaner. But the best part is that it's fast (normally taking less than a second to run) and contains NO Spyware or Adware!

Ccleaner V3.9.1493 Update

Changelog.
  • Added Firefox 7.0 Beta support.
  • Added Firefox 6.0 Final support.
  • Added IE 9.0.2 support.
  • Added Safari 5.1 binarycookies file cleaning and management.
  • Added cleaning for MS Search, Cached Fonts, RegEditX, SpeedBit DAP, Spyware Terminator, SUPERAntiSpyware, Acrobat Distiller 10 and Foxit Reader 5.0.
  • Improved cleaning for Internet Download Accelerator.
  • Improved Opera 9 Last Download Location cleaning.
  • Improved accuracy and reliability for free space and entire drive wiping.
  • Improved Safari local storage cleaning.
  • Improved Google Chrome "Saved Form Information" and "Saved Passwords" cleaning.
  • Updated various translations.
  • Minor optimization tweaks.

(Logos are copyrighted by their respective owners.)

Download from www.piriform.com/ccleaner

Share:

TIP: Give Windows a Regular Maintenance Routine

It is true, Windows implementation of its registry and and its filesystem will leave you literally fragmented after running for a while. This is where Windows lags from other OS big time. For me re-installing is not an option and I'm quite positive the same goes for you. Re-installing is a big no, no.. so how do you perform a clean-up of the system with confidence that you won't be ruining things rather than make it better?

I use CCleaner to clean-up the registry and clean-up the filesystem. CCleaner identifies the crap and cleans it. That is why it is a required tool for me. The next one that helps root out crap on the PC, is Windows' very own Disk Cleanup.

Purging via CCleaner. CCleaner (Crap Cleaner) is very robust in itself. But it can further be enhanced. Further functionality can be added to CCleaner with the CCEnhancer.

CCEnhancer can further extend the functionality of CCleaner to clean-up more applications. Below is a screenshot of CCleaner extended with CCEnhancer.

Give Windows a Regular Maintenance Routine

From the above, just select the applications that need clean-up and hit "Run Cleaner". If you want to review or preview the details of the clean-up, you can "Analyze" first and "Run Cleaner" later.

Disk Cleanup. There are other software CCleaner will not touch. And the Disk Cleanup utility can purge it. What's more Disk Cleanup can be run in Automated-Mode. Here's how you set it up.

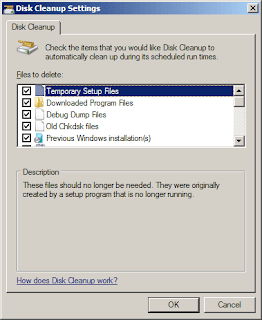
Launch the disk cleanup and configure it for automation. You do this via the Run command window. Start -> Run.. "cleanmgr /sageset:11" (11 can be any number you want, as long as it is easy to remember). You then get a window that looks like the screenshot below. I usually tick everything in it.

Give Windows a Regular Maintenance Routine

To automate the setting, you can run cleanmgr like this: "cleanmgr /sagerun:11" (11 here is the number you set from the argument /sageset above). Launch the Task Scheduler > "Create a Basic Task" > Give it a Task Name. Click Next.

Trigger, could be monthly or weekly depending on how frequent you want the cleanup to run. I set mine to run monthly, every 15th of the month. Action is to start a program "cleanmgr.exe" and argument is "/sagerun:11".

Accept by clicking ok. And as scheduled, the cleanup will run when the schedule triggers it to. It is also automated, which makes life hassle-free once you set it up the first time.

Share:

Subscribe for Latest Update

Popular Posts

Post Labels

100gb (1) acceleration (1) acrobat (1) adblock (1) advanced (1) ahci (1) airdrop (2) aix (14) angry birds (1) article (21) aster (1) audiodg.exe (1) automatic (2) autorun.inf (1) bartpe (1) battery (2) bigboss (1) binance (1) biometrics (1) bitcoin (3) blackberry (1) book (1) boot-repair (2) calendar (1) ccleaner (3) chrome (5) cloud (1) cluster (1) compatibility (3) CPAN (1) crypto (3) cydia (1) data (3) ddos (1) disable (1) discount (1) DLNA (1) dmidecode (1) dns (7) dracut (1) driver (1) error (10) esxi5 (2) excel (1) facebook (1) faq (36) faucet (1) firefox (17) firewall (2) flash (5) free (3) fun (1) gadgets (4) games (1) garmin (5) gmail (3) google (4) google+ (2) gps (5) grub (2) guide (1) hardware (6) how (1) how-to (45) huawei (1) icloud (1) info (4) iphone (7) IPMP (2) IPV6 (1) iscsi (1) jailbreak (1) java (3) kodi (1) linux (28) locate (1) lshw (1) luci (1) mafia wars (1) malware (1) mapsource (1) memory (2) mikrotik (5) missing (1) mods (10) mouse (1) multipath (1) multitasking (1) NAT (1) netapp (1) nouveau (1) nvidia (1) osmc (1) outlook (2) p2v (2) patch (1) performance (19) perl (1) philippines (1) php (1) pimp-my-rig (9) pldthomedsl (1) plugin (1) popcorn hour (10) power shell (1) process (1) proxy (2) pyspark (1) python (13) qos (1) raspberry pi (7) readyboost (2) reboot (2) recall (1) recovery mode (1) registry (2) rename (1) repository (1) rescue mode (1) review (15) right-click (1) RSS (2) s3cmd (1) salary (1) sanity check (1) security (15) sendmail (1) sickgear (3) software (10) solaris (17) squid (3) SSD (3) SSH (9) swap (1) tip (4) tips (42) top list (3) torrent (5) transmission (1) treewalk (2) tunnel (1) tweak (4) tweaks (41) ubuntu (4) udemy (6) unknown device (1) updates (12) upgrade (1) usb (12) utf8 (1) utility (2) V2V (1) virtual machine (4) VirtualBox (1) vmware (14) vsphere (1) wannacry (1) wifi (4) windows (54) winpe (2) xymon (1) yum (1) zombie (1)

Blog Archives

RANDOM POSTS